
TL;DR:
- Effective Edmonton landscaping begins with detailed site analysis of soil, drainage, sun, and wind to prevent costly rework. Proper sequencing—underground utilities, grading, hardscape, then planting—ensures project success and regulatory compliance. Utilizing project management tools and high-quality materials streamlines workflows and minimizes installation issues in Alberta’s climate.
Managing an outdoor landscaping workflow in Edmonton is genuinely complex. Short growing seasons, unpredictable frost timing, municipal permit requirements, and the logistical challenge of coordinating materials, crews, and plant schedules across multiple properties all converge on a single project. Property owners and managers who skip structured planning often end up paying for it twice, literally, when drainage issues surface mid-installation or plant selections fail to survive an Alberta winter. This guide walks through every critical phase: preliminary site analysis, planning and scheduling around Edmonton’s frost calendar, project management tools that reduce miscommunication, and installation best practices that keep your project compliant and on track.
Table of Contents
- The outdoor landscaping workflow starts with site analysis
- Planning and preparation: from site data to a workable schedule
- Project management tools that improve workflow efficiency
- Execution and installation: best practices for Edmonton projects
- My take on workflow discipline in Edmonton’s landscaping environment
- How Prozoneltd supports your landscaping workflow in Edmonton
- FAQ
The outdoor landscaping workflow starts with site analysis
Before any shovel breaks ground, the most experienced landscapers in Edmonton do one thing consistently: they analyze the site in detail. Site analysis elements including soil condition, drainage patterns, sun and shade exposure, wind direction, and existing vegetation are the foundation on which every design decision rests. Skipping this step doesn’t save time. It creates rework that costs far more than the analysis itself.
What to document during a site inventory
A thorough site inventory captures far more than just what’s visible. For Edmonton properties, the following elements deserve attention:
- Property boundaries and existing structures: Locate utility lines, fences, outbuildings, patios, and hard surfaces. Confirm property lines before planning any permanent installations.
- Existing vegetation: Catalog trees, shrubs, and ground cover. Note which plants are healthy, which are invasive, and which have landscape potential.
- Soil composition and drainage: Edmonton soils range from heavy clay in some neighborhoods to sandy loam in others. Test drainage by digging a hole 12 inches deep, filling it with water, and observing how quickly it drains. Clay soils that drain less than one inch per hour will require amendments or raised bed strategies.
- Sun and shade mapping: Walk the property at different times of day and record sun exposure in each zone. This directly determines plant selection and irrigation needs.
- Wind and microclimate patterns: Note areas sheltered by structures or hedgerows versus exposed corners. Wind exposure in Edmonton can desiccate plants and increase frost damage even when temperatures are technically above freezing.
- Grading and slope: Identify areas where water pools or runoff could cause erosion. Proper grading is especially important given Edmonton’s significant spring melt volumes.
Building a scaled base map
Once the inventory is complete, translate all measurements and observations into a scaled base map. This doesn’t require expensive software at the outset. A hand-drawn sketch with accurate measurements at a standard scale like 1:100 works well. The base map becomes your working document for all subsequent design decisions, and it prevents the common mistake of designing elements that physically cannot fit or that conflict with existing structures.
Pro Tip: Photograph every corner of the property during your inventory, including drainage outlets, existing plant root zones near structures, and soil test locations. These photos become invaluable reference points when making design revisions weeks later.
The following table summarizes the core site analysis components and their impact on workflow decisions:
| Site Analysis Element | What to Observe | Workflow Impact |
|---|---|---|
| Soil type and drainage | Clay, loam, or sand; drainage rate | Determines amendments, raised beds, irrigation design |
| Sun/shade mapping | Hours of direct sun per zone | Drives plant selection and placement |
| Wind exposure | Prevailing direction, shelter zones | Affects plant choices and hardscape placement |
| Grading and slope | Water flow direction, pooling areas | Informs drainage design and material sequencing |
| Existing vegetation | Species, health, root zones | Identifies what stays, goes, or needs protection |
| Utility and boundary lines | Underground services, legal limits | Prevents costly relocations and permit violations |
Planning and preparation: from site data to a workable schedule
With a complete site inventory in hand, the next phase is translating that data into a design brief and a project schedule. This is where Edmonton’s specific climate conditions become non-negotiable inputs, not optional considerations.

Building around Edmonton’s frost calendar
Edmonton’s last frost falls around May 14, with a frost-free growing season of approximately 132 days running through to around September 23. That’s a tighter window than most of Canada’s major cities. For property managers overseeing multiple sites, this means installation schedules for frost-sensitive plantings must be queued to start no earlier than mid-May and wrapped up well before late September to allow for plant establishment before the first fall frost.
Hardscape work including concrete, asphalt, and edging installation can be scheduled earlier in the season once ground frost has cleared, typically from late April in most Edmonton neighborhoods. Sequencing hardscape before softscape allows crews to avoid damaging newly planted material with equipment traffic.
Setting workflow checkpoints and deliverables
One of the most effective ways to prevent rework and scope creep is to build defined deliverables and sign-offs into each phase of the project. A structured workflow with phase approvals looks like this:
- Site survey and inventory sign-off: Client or property manager reviews and approves all documented site conditions before design begins.
- Design brief approval: Agree on project goals including activity zones, traffic circulation, views to screen or preserve, and maintenance expectations.
- Concept plan review: Present a bubble diagram or concept layout showing spatial relationships before investing in detailed design.
- Detailed design approval: Finalize materials, plant palette, and grading plan with full dimensions.
- Planting plan sign-off: Confirm species, quantities, spacing, and installation sequence.
- Installation phasing agreement: Establish start dates, crew access protocols, and interim milestones for a project that spans multiple weeks.
Each of these checkpoints creates a documented record that protects both the property manager and the installer. Changes requested after an approved phase are handled as formal change orders rather than informal verbal adjustments that lead to billing disputes later.
Pro Tip: When selecting plants for an Edmonton property, cross-reference your selections with the USDA Hardiness Zone 3b to 4a rating, which covers most of Edmonton. Choosing species rated for Zone 3 or colder provides a meaningful buffer against late spring frosts and early fall temperature drops.
For reference, materials suited to Alberta’s climate conditions are covered in detail in Edmonton outdoor landscaping materials, which is a useful companion resource during the planning phase.
Project management tools that improve workflow efficiency
Once your plan is approved and your schedule is set, the real challenge for property managers becomes execution across multiple sites, crews, and seasonal cycles. This is where landscaping project management software delivers tangible results. Tools like ServiceDeck and SynkedUP were built specifically for this industry, and their feature sets reflect the actual needs of field crews and office managers operating simultaneously.
Key capabilities to look for in landscaping workflow tools
- Centralized job folders: Every project file, including photos, service notes, material lists, and client communications, lives in one place accessible by both field and office staff.
- Route and schedule optimization: Crew routes and daily schedules are managed from a single dashboard, which reduces travel time and prevents double-booking on multi-property portfolios.
- Real-time field updates: Crew leaders can update job status, flag issues, and upload photos directly from a mobile device. Office staff see changes instantly without waiting for end-of-day reports.
- Recurring maintenance scheduling: Edmonton properties often require recurring services including spring cleanup, summer maintenance, and fall prep. Automated scheduling for recurring visits reduces the risk of missed cycles.
- Change order management: Field change documentation via mobile apps updates job folders immediately when plant substitutions or material changes occur on site. This prevents billing errors and keeps the project record accurate.
Comparing two leading platforms for landscaping operations
| Feature | ServiceDeck | SynkedUP |
|---|---|---|
| Job and schedule management | Yes | Yes |
| Mobile field updates | Yes | Yes |
| Photo and document storage | Yes | Yes |
| Change order processing | Limited | Full mobile workflow |
| Cost and budget tracking | Basic | Detailed job costing |
| Recurring schedule automation | Strong | Moderate |
| Client communication tools | Yes | Limited |
The right tool depends on your portfolio size and whether you prioritize client-facing features or internal job costing. For property managers running 20 or more active sites, a centralized operational record covering schedules, notes, photos, and material tracking eliminates most of the “lost detail” problems that cause delays and client dissatisfaction.
Professional design software like Vectorworks Landmark takes the digital workflow even further, supporting integrated design documentation from initial site analysis through 3D visualization and detailed planting plans in a single environment. For landscape contractors managing large commercial or municipal accounts in Edmonton, this level of documentation adds credibility and precision to client presentations.
Pro Tip: Before committing to any project management platform, run a 30-day trial using one real project. Track how long it takes to resolve a single change order, update a crew schedule, and retrieve a past service photo. Those three tasks will tell you whether the software fits your actual workflow or just looks good in a demo.
Execution and installation: best practices for Edmonton projects
The planning is done. The software is set up. Now the real test begins. Translating a well-crafted plan into a finished landscape without surprises requires disciplined sequencing, thorough documentation, and an understanding of Alberta’s regulatory requirements.
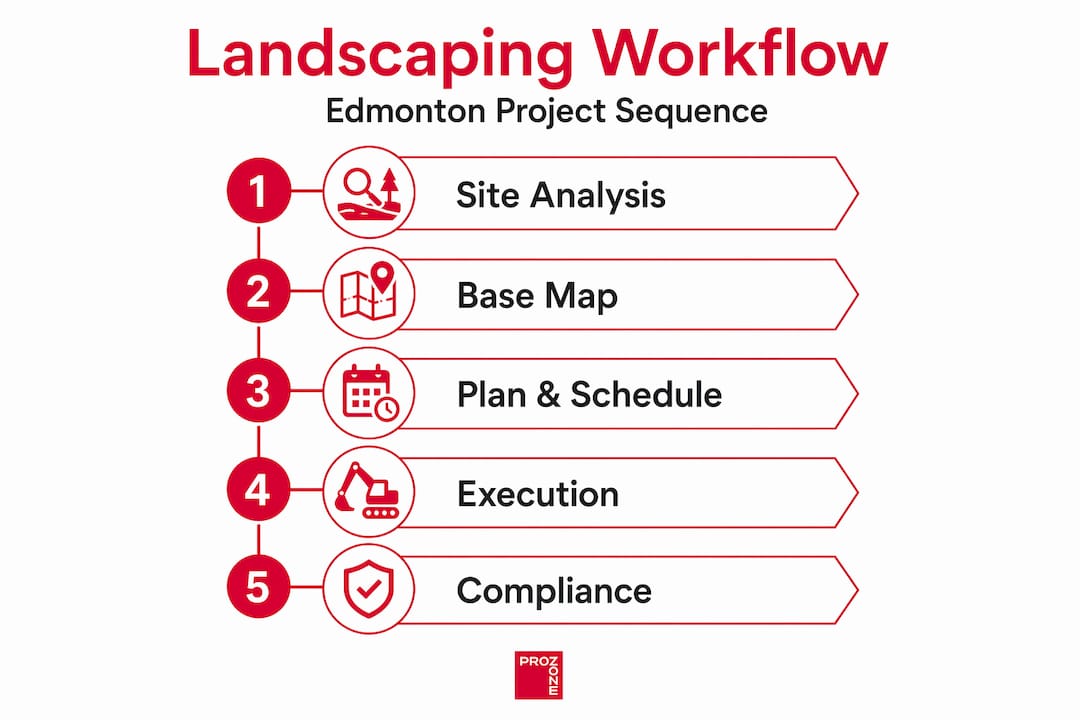
Sequencing your installation correctly
The order of operations in a landscaping installation matters as much as the design itself. Follow this general sequence to minimize disruptions:
- Underground utilities and drainage first: Install any buried irrigation lines, drainage pipes, or conduit before placing hardscape. Retrofitting drainage through finished paving is expensive and disruptive.
- Grading and soil preparation: Complete all earthworks, grade corrections, and soil amendments before hardscape or softscape installation. This is especially important in Edmonton where spring frost heave can shift grades significantly between the design date and installation date.
- Hardscape installation: Lay patios, pathways, edging, and retaining structures before planting. Equipment traffic during hardscape work will damage plant material.
- Topsoil and amendments: Apply screened topsoil and soil amendments to planting beds after hardscape is complete. Quality soil products for Edmonton significantly affect long-term plant health and reduce the need for costly reseeding or replanting.
- Plant installation: Begin planting after mid-May to respect Edmonton’s frost calendar. Stake trees, mulch beds to a 3-inch depth for moisture retention and frost protection, and install any tree guards for wildlife pressure.
- Turf or sod last: Lay sod or seed turf areas last to avoid disturbance from other trades and equipment.
Compliance and documentation during installation
Alberta’s regulatory environment adds a layer of documentation that many property managers underestimate. Landscaping as a permit condition in Alberta often includes a 24-month plant establishment period before the municipality provides final sign-off. This means that plant deaths, replacement schedules, and maintenance records from installation through establishment all need to be logged.
The following table summarizes the most common installation pitfalls and how to address them:
| Common Pitfall | Root Cause | How to Prevent It |
|---|---|---|
| Plant failure in Year 1 | Frost-sensitive species planted too early | Follow May 14 frost-free date strictly |
| Drainage issues post-installation | Grading changes not rechecked before planting | Reconfirm grades after earthworks, before planting |
| Permit non-compliance | Missing establishment period records | Log all plant replacements and maintenance visits |
| Material delivery conflicts | Poor sequencing with crew schedules | Coordinate deliveries against installation phase calendar |
| Damage to new plantings | Equipment traffic after softscape installation | Complete all hardscape before planting begins |
Thorough documentation during installation, including photos with timestamps, delivery receipts, and crew logs, also serves as your defense if disputes arise with a municipality or client over what was installed and when. Consider this documentation a permanent part of the project record, not optional paperwork.
For a deeper look at the structural and regulatory dimensions of landscape construction in Edmonton, Prozoneltd has published a practical guide specifically for Alberta property owners navigating compliance during installation.
My take on workflow discipline in Edmonton’s landscaping environment
I’ve seen the same pattern repeat itself on Edmonton properties more times than I can count. A property manager who runs a well-organized office will attempt to manage a landscaping project the same way they manage a maintenance contract, loosely, with the assumption that details will sort themselves out. They almost never do.
What I’ve learned working in Alberta’s construction and landscaping space is that the site analysis phase is treated as optional far too often. Property owners want to skip straight to choosing plants and materials because that’s the visible, satisfying part of the process. But a rushed site inventory is the single most reliable predictor of problems during installation. Poor drainage discovered after hardscape is laid. A plant palette chosen without accounting for wind exposure on the north face of a building. A grading plan that works on paper but conflicts with how water actually moves across the property in spring.
The other thing I’d push back on is the assumption that project management software is only for large landscaping contractors. A property manager overseeing five commercial sites in Edmonton can lose an enormous amount of time to miscommunication, lost notes, and unanswered questions about what was done last season. A simple, well-configured job management system pays for itself in the first month, not because it’s clever technology, but because it makes the mundane stuff, schedules, photos, and change records, automatic rather than effortful.
My honest recommendation: invest the most time and attention in the two phases that feel the least exciting. Nail your site analysis. Build your checkpoint system. The installation phase becomes straightforward when those two things are done properly.
— ProZone
How Prozoneltd supports your landscaping workflow in Edmonton
A structured outdoor landscaping workflow is only as strong as the materials backing it. Prozoneltd supplies Edmonton property owners and managers with the high-quality landscaping materials needed to execute each phase correctly, from soil preparation through final finishing. Their range of commercial landscaping materials includes screened topsoil, rock chips, and landscaping edging products designed for Alberta’s freeze-thaw conditions. Whether you’re preparing beds for spring planting, stabilizing slopes, or finishing pathways, having the right material on site at the right time is a workflow issue as much as a budget one.
Prozoneltd also provides an Alberta installation guide that gives property managers practical direction on material placement, depth requirements, and compliance considerations. For property managers looking to reduce reliance on trial and error, Prozoneltd’s materials and guidance resources function as a practical extension of the planning process described in this article. Explore their landscaping edging options and full product catalog at prozoneltd.ca to find materials suited for your next Edmonton landscaping project.
FAQ
What is the most important first step in a landscaping workflow?
A detailed site analysis covering soil type, drainage, sun and shade patterns, wind exposure, and existing vegetation is the foundation of any effective landscaping workflow. Skipping this step is the leading cause of rework and plant failure.
When should I start planting in Edmonton?
Edmonton’s last frost falls around May 14, so frost-sensitive plants should not go in the ground before mid-May. The frost-free growing season runs approximately 132 days through to late September.
How long does landscaping permit compliance take in Alberta?
Alberta municipalities commonly require a 24-month establishment period for planted material before issuing final landscaping sign-off on development permits. Property managers should plan maintenance and replacement documentation from day one of installation.
Do small property portfolios need landscaping project management software?
Yes. Even managing five properties benefits significantly from centralized schedules, service notes, and photo records. Software like ServiceDeck and SynkedUP reduces missed visits, lost details, and billing disputes regardless of portfolio size.
What sequencing rule prevents the most installation problems?
Complete all underground work and grading before hardscape, and all hardscape before planting. This single rule eliminates the most common and costly installation conflicts, including drainage retrofits through finished paving and equipment damage to new plant material.