
TL;DR:
- Proper walkway installation involves thorough planning, excavation, base preparation, and precise grading to ensure durability, especially in freeze-thaw environments like Edmonton. Using high-quality materials such as pavers or poured concrete on a well-compacted gravel base and correct drainage slope significantly extends the walkway’s lifespan. Skipping steps like base compaction, slope verification, or edging increases the risk of cracking, shifting, and eventually costly repairs.
Walkway installation is defined as the full process of planning, excavating, preparing a base, grading for drainage, and finishing an outdoor path with materials such as concrete, pavers, or natural stone. The process goes well beyond simply placing surface material. A properly installed walkway requires compacted gravel base layers, precise slope management, edging restraints like aluminium edging, and joint filling with polymeric sand. In Edmonton’s climate, where freeze-thaw cycles can shift and crack poorly built surfaces within a single winter, every step in the installation process directly affects how long the walkway lasts.
What is walkway installation and what does it involve?
Walkway installation is the structured construction of a functional outdoor path from raw ground to finished surface. The full installation process covers layout planning, utility marking, excavation, base preparation, grading, edging, surface placement, and finishing. Skipping or shortcutting any of these stages produces a path that shifts, cracks, or floods within a few seasons.
The tools involved are specific and purposeful. A plate compactor densifies the gravel base in lifts. Screeding tools level the bedding sand. Tampers consolidate material in tighter areas. Aluminium edging holds the perimeter in place, and polymeric sand locks paver joints after activation with water. Each tool serves a structural function, not just an aesthetic one.
Property owners often underestimate the scope of the work until they see the excavation depth required. A standard paver walkway needs 6 inches of compacted gravel base plus 1 inch of bedding sand before a single paver is placed. That depth is not arbitrary. It accounts for load distribution, frost penetration, and drainage capacity.
What materials are used for walkways and how do they compare?
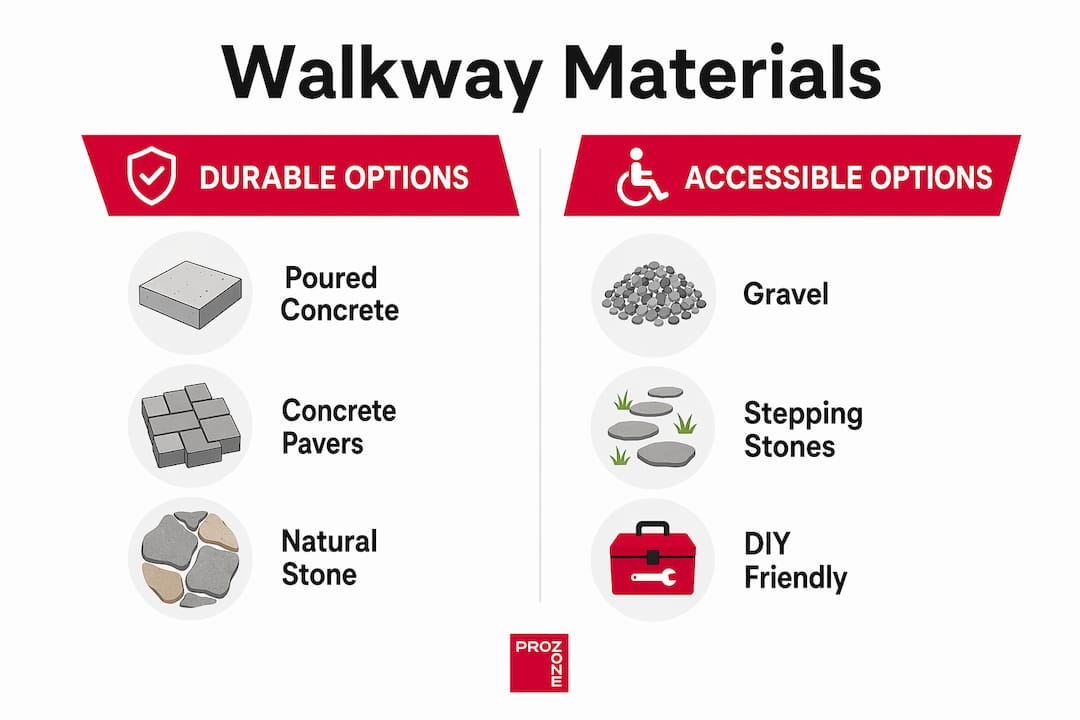
The four most common walkway materials are poured concrete, concrete pavers, natural stone, and gravel with stepping stones. Each differs in cost, installation complexity, lifespan, and maintenance demand.
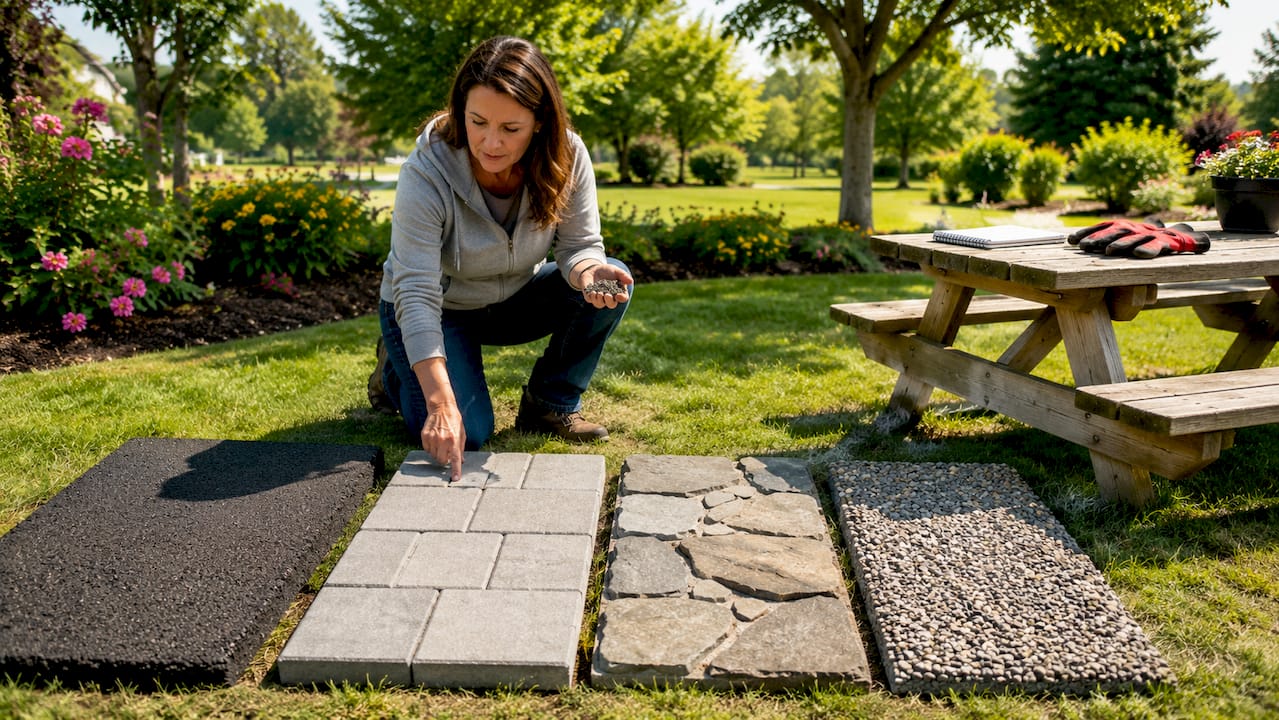
Poured concrete is the most durable option for high-traffic paths. It requires control joints every 4–5 feet to manage shrinkage cracking as it cures. Without those joints, random cracks form across the surface and compromise both appearance and structural integrity. Concrete also demands careful moisture management during curing.
Concrete pavers offer flexibility in design and are easier to repair than poured concrete. Their quality depends entirely on base preparation. Paver installations succeed or fail based on adequate base compaction in lifts and even screeding of the bedding sand. Aluminium edging secured with spikes prevents lateral spread, and polymeric sand activated by watering locks joints permanently.
Natural stone such as flagstone or slate delivers strong visual appeal but comes at a higher material and labour cost. The irregular shapes require skilled cutting and fitting, which adds installation time. Stone also performs well in freeze-thaw conditions when set on a proper base.
Gravel and stepping stones are the most accessible for DIY walkway installation. They drain well naturally and cost less upfront, but require ongoing maintenance to keep gravel contained and stepping stones level.
| Material | Approx. Cost (per sq ft) | Lifespan | Maintenance | Freeze-Thaw Performance |
|---|---|---|---|---|
| Poured Concrete | $8–$15 | 25–40 years | Low | Good with control joints |
| Concrete Pavers | $12–$20 | 20–30 years | Low to medium | Excellent with proper base |
| Natural Stone | $18–$35 | 30+ years | Medium | Good with proper base |
| Gravel/Stepping Stone | $3–$8 | 5–15 years | High | Fair |
Pro Tip: For Edmonton properties, choose pavers or concrete over gravel for primary walkways. Gravel migrates under freeze-thaw pressure and becomes a maintenance burden by spring.
How is the walkway installation process executed step by step?
The walkway installation process follows a defined sequence. Deviating from that sequence, particularly in the base preparation stages, produces structural failures that no surface repair can fix.
Here is the standard installation sequence used by professional contractors:
- Mark the layout. Define the path width and alignment using stakes and string lines. The minimum walkway width is three feet, four feet for comfortable two-way passage, and 60 inches for full accessibility compliance.
- Call 811. Contact Alberta One-Call at least 48 hours before excavation to locate underground utilities. This is a legal requirement, not optional.
- Excavate to depth. Remove soil to accommodate the base layers plus surface material. For pavers, this typically means excavating 8–10 inches below finished grade.
- Compact the subgrade. Use a plate compactor on the native soil before adding any base material.
- Install the gravel base in lifts. Add compacted gravel in 2-inch lifts to reach the required depth. Compaction in 2-inch lifts prevents settling and uneven surfaces over time.
- Screed the bedding sand. Spread 1 inch of coarse bedding sand and screed it level using guide rails. Even screeding is critical to prevent rocking pavers.
- Install edging restraints. Secure aluminium edging along both sides of the path before placing surface material.
- Place the surface material. Lay pavers, stone, or pour concrete according to the design pattern.
- Fill joints and finish. For pavers, sweep polymeric sand into joints and activate with water. For concrete, cut control joints and begin the curing process.
- Manage curing. Concrete requires continuous moisture for 5–7 days after pouring. Full strength develops over approximately 28 days.
Pro Tip: Do not rush the curing stage on concrete walkways. Opening a new concrete path to foot traffic before 48 hours of initial set risks surface damage that cannot be reversed without full replacement.
For a detailed look at site excavation procedures that apply directly to walkway projects, ProZone’s project management guide covers the full scope.
What are the drainage and grading requirements for walkways?
Drainage is the single most critical factor in walkway longevity, particularly in Edmonton where standing water freezes and expands beneath surfaces each winter. Slope and drainage planning are non-negotiable for long-term performance.
The standard slope recommendation is 1/4 inch per foot, directed away from buildings and structures. That grade moves surface water off the path before it can pool or penetrate the base. Crowning, which means raising the centre of the walkway slightly above the edges, adds a secondary drainage mechanism for wider paths.
Poor drainage produces predictable and costly outcomes:
- Standing water saturates the base layers and reduces compaction strength
- Freeze-thaw cycles expand trapped moisture, shifting pavers and cracking concrete
- Repeated freeze-thaw movement causes joint spreading and surface settlement
- Water pooling near building foundations accelerates structural damage over time
Achieving proper grade requires checking slope with a level and tape measure at multiple points during base preparation, not just at the finished surface. Correcting grade after surface installation is expensive and often requires full removal. Drainage engineers on larger commercial projects integrate walkway drainage into the broader site water management plan, which prevents conflicts between walkway runoff and adjacent landscaping or paved areas.
What factors affect walkway installation cost?
Walkway installation cost depends on material choice, path dimensions, base preparation requirements, equipment use, and site conditions. Understanding where costs concentrate helps you allocate budget toward the elements that most affect durability.
Key cost factors include:
- Material selection. Gravel is the lowest cost option. Natural stone is the highest. Concrete and pavers fall in the middle range, with pavers typically costing more than poured concrete per square foot.
- Base preparation. A proper gravel base and compaction process adds cost but directly extends walkway lifespan. Contractors who skip base layers reduce upfront cost and increase long-term failure risk.
- Equipment rental. A plate compactor rental in Edmonton runs approximately $80–$150 per day. For DIY walkway installation, this cost is unavoidable if you want a stable base.
- Edging and joint materials. Aluminium edging, polymeric sand, and drainage aggregate are additional line items that some budget quotes omit entirely.
- Path length and width. Wider and longer paths increase material volume, labour hours, and equipment time proportionally.
- Drainage features. Adding channel drains, catch basins, or French drains to manage runoff adds cost but prevents far more expensive repairs later.
Pro Tip: Get itemised quotes that separate base preparation costs from surface material costs. A quote that bundles everything into a single price per square foot often hides a thin base specification that will fail within three to five years.
For property owners comparing paving contractor options, understanding what a proper base specification looks like helps you evaluate whether a low bid reflects efficiency or corner-cutting.
Why proper preparation matters more than surface choice
After working on walkway and paving projects across Edmonton and the surrounding region, the pattern is consistent: the failures that show up in year two or three almost always trace back to decisions made in the first two hours of installation.
The most common mistake is treating the surface material as the product and the base as a formality. Property owners see the finished pavers or concrete and assume that is where the value lives. The long-term quality of paver walkways is built into foundation compaction and sand screeding, not the visible surface. That principle holds for every material type.
Edmonton’s freeze-thaw cycle is unforgiving. A base that is compacted to 95% density in summer will shift when ground moisture freezes and expands in November. A base that is compacted in 2-inch lifts with a plate compactor, properly graded, and protected by edging restraints will absorb that movement without transferring it to the surface.
The other consistent failure point is drainage. Contractors who skip the slope check or crown the walkway incorrectly create a water collection problem that no sealant or joint repair will solve. Water finds every weakness in a poorly graded surface and exploits it through every freeze-thaw cycle for the life of the path.
Choose certified contractors who can show you their base specification before they start. Ask specifically about compaction lift depth, gravel base thickness, and slope verification method. Those questions separate professional installation from work that looks good in October and fails by April.
— Prozoneltd
Professional walkway installation in edmonton by Prozoneltd
Prozoneltd delivers walkway installation across Edmonton and the surrounding area, built to Alberta Safety Codes and designed for the region’s demanding freeze-thaw conditions. Every project includes proper excavation, layered gravel base compaction, precise drainage grading, and surface finishing with quality materials. Whether you are planning a residential front path or a commercial pedestrian corridor, Prozoneltd’s team brings the equipment, certifications, and regional experience to do the work correctly the first time.
Explore Prozoneltd’s full range of Edmonton construction services or contact the team directly through the online form for a free estimate on your walkway project. Getting the base right from the start is always less expensive than repairing a failed one.
FAQ
What is walkway installation?
Walkway installation is the complete process of planning, excavating, preparing a compacted base, grading for drainage, and finishing an outdoor path with materials such as concrete, pavers, or natural stone. It includes edging, joint filling, and curing steps that determine long-term durability.
How long does it take to install a walkway?
A standard residential paver walkway typically takes one to three days for installation, depending on path length and base preparation requirements. Concrete walkways require an additional 5–7 days of curing before use and reach full strength after approximately 28 days.
What is the best material for a walkway in edmonton?
Concrete pavers and poured concrete are the most reliable choices for Edmonton’s freeze-thaw climate. Both perform well when installed on a properly compacted gravel base with correct drainage slope, while gravel and stepping stones require significantly more seasonal maintenance.
Why do walkways crack or shift over time?
Walkways crack or shift primarily due to inadequate base compaction, poor drainage grading, or missing edging restraints. In Edmonton, freeze-thaw cycles expand moisture trapped in under-prepared bases, which lifts and displaces surface materials regardless of their quality.
Can i install a walkway myself?
DIY walkway installation is feasible for gravel paths and simple stepping stone layouts, but poured concrete and paver installations require a plate compactor, precise screeding, and drainage grading that most homeowners lack the equipment and experience to execute correctly. Errors in base preparation are costly to correct after the surface is placed.