
Remove the failed material, clean the joint to bare concrete, and install closed-cell backer rod sized so the sealant depth holds a 2:1 width-to-depth ratio. Then seal with a traffic-grade polyurethane or self-leveling polyurethane, tooled properly and cured per the manufacturer’s data sheet. That sequence, done correctly, is what separates a repair that lasts eight to ten years from one that fails by the next freeze-thaw cycle.
Concrete expansion joint repair is not complicated in theory, but the tolerances are tight. Sealant depth for horizontal, traffic-bearing joints should sit between 6 mm and 13 mm, and getting that wrong is the single most common cause of early bond failure.
A few conditions mean you should stop and call a contractor instead of finishing the job yourself:
- Edge spalling or crumbling concrete along the joint faces
- Cracks radiating from the joint into the slab body
- Post-tensioned slabs, where cutting or drilling near tendons risks structural damage
- Joints wider than roughly 25 mm or showing repeated, recent failure
The methods described here follow ASTM C1193 and ASTM C920 application and material standards, with CSA A23.1-19 as the reference point for freeze-thaw durability in Canadian concrete work.
Table of Contents
- Why concrete expansion joints fail
- What materials and design ratios does a lasting repair require?
- How do you actually repair a concrete joint step by step?
- Which tools and PPE do you need, and when should you schedule the work?
- When should you hire a professional for joint repair?
- How long does a repaired joint take to cure before you can use it?
- What keeps a repaired expansion joint from failing again?
- What does concrete expansion joint repair typically cost?
- What ProZone sees most often in freeze-thaw failures
- Get a free estimate on your concrete joint repair
- Sources
- FAQ
Why concrete expansion joints fail
Joints don’t fail suddenly. They fail in stages, and by the time you notice a problem, water has usually already been getting underneath the sealant for one or two seasons. Understanding the sequence tells you whether you’re looking at a simple resealing job or something that needs a contractor’s eye.
Water is the trigger, freeze-thaw is the amplifier. Once a sealant bond breaks or a joint opens beyond its design tolerance, water gets into the joint and the base material below it. In Edmonton’s climate, that water freezes, expands, and forces the crack wider with every cycle. Add de-icing salt to the mix and you get chloride ions working their way toward reinforcing steel, which corrodes and expands, cracking the concrete from the inside out. Concrete Alberta identifies joint sealing as one of the most cost-effective preventive measures against exactly this chain of events, precisely because it blocks water at the entry point rather than after damage has spread.
Winter exposure is when weaknesses that were invisible in July become obvious. A joint that looked fine in September can show open cracking by March once a few freeze-thaw cycles and a couple of de-icing applications have worked on it, and that seasonal reveal is why early inspection pays off more than most property managers assume.
Watch for these signs before the damage escalates:
- Brittle, cracked, or crumbling sealant that no longer flexes when pressed
- A joint gap that’s visibly wider than it was the previous year
- Water staining or efflorescence on the underside of a slab, indicating leakage into sublayers
- Spalled or chipped edges along the joint faces
- Weeds or debris packed into the joint, holding moisture against the concrete
One distinction matters before you buy materials: expansion joints and control joints are not the same thing, and they don’t take the same repair. Expansion joints are designed to absorb real movement between slabs, so they need a flexible sealant. Control joints manage where a slab is allowed to crack from shrinkage, and they’re often filled with a stiffer material since they see less true movement. Using a rigid filler in an expansion joint is a common field mistake, and it’s one of the fastest ways to guarantee a repeat failure within a year.
What materials and design ratios does a lasting repair require?
Get the material category right and the dimensions right, and the rest of the job is mostly technique. Get either wrong and no amount of careful tooling will save the repair.
Polyurethane sealants are the standard for horizontal, traffic-bearing joints. Gun-grade polyurethane works for most sidewalk, driveway, and parking lot joints where you’re tooling the bead by hand. Self-leveling polyurethane, such as Sikaflex-1c SL, is formulated to flow and settle on its own in a horizontal joint, which cuts tooling labour significantly. Some self-leveling formulations can even be applied to green or slightly damp concrete, a real advantage on new-pour repair schedules. W. R. Meadows HS-1 SL is another self-leveling polyurethane built for the same horizontal application, with a defined depth window of 6.4 mm to 12.7 mm and roughly 25% movement capability. Silicone sealants have their place, but mainly on vertical joints and control joints rather than the horizontal, traffic-bearing joints most homeowners and property managers are dealing with.
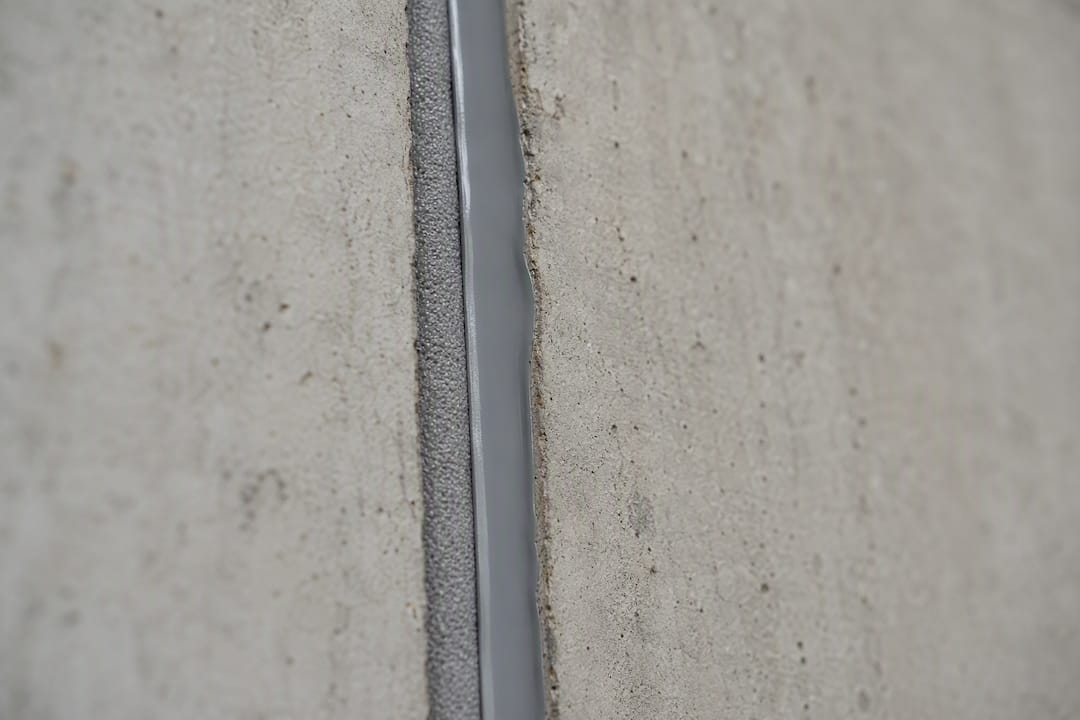
Backer rod has to be closed-cell polyethylene, full stop. Open-cell backer rod looks similar and costs less, but it absorbs water like a sponge. Once wet, it holds moisture against the sealant from behind, which undermines the bond and accelerates freeze-thaw cracking from the inside. It’s a small material substitution that generic contractors sometimes make to save a few dollars, and it’s one of the most common reasons a “repaired” joint fails again within a single winter.
The design rule that governs everything else: sealant depth should follow a 2:1 width-to-depth ratio, with a practical depth range of 6 mm minimum to 13 mm maximum for traffic-bearing joints. A 25 mm wide joint, for example, gets roughly 12 to 13 mm of sealant depth, backed by the rod to hit that number precisely. Most quality polyurethane sealants carry a movement capability in the 25% to 35% range, meaning the joint can expand and contract that much relative to its width without the bond tearing.
Pro Tip: Check the product data sheet before assuming you need primer. Many self-leveling polyurethanes skip primer on clean, sound concrete, but porous or previously contaminated substrates almost always need it for a reliable bond.
How do you actually repair a concrete joint step by step?
This is the sequence that turns the materials above into a repair that survives an Alberta winter rather than one that looks fine until the first thaw.
1. Set up the site safely. Cordon off the work area with cones or barricades if it’s in a traffic path, wear safety glasses and gloves, and if you’re using a grinder or router, control dust with a vacuum attachment or wet-cutting method. Solvent fumes from cleaning agents need ventilation, especially in enclosed garages.
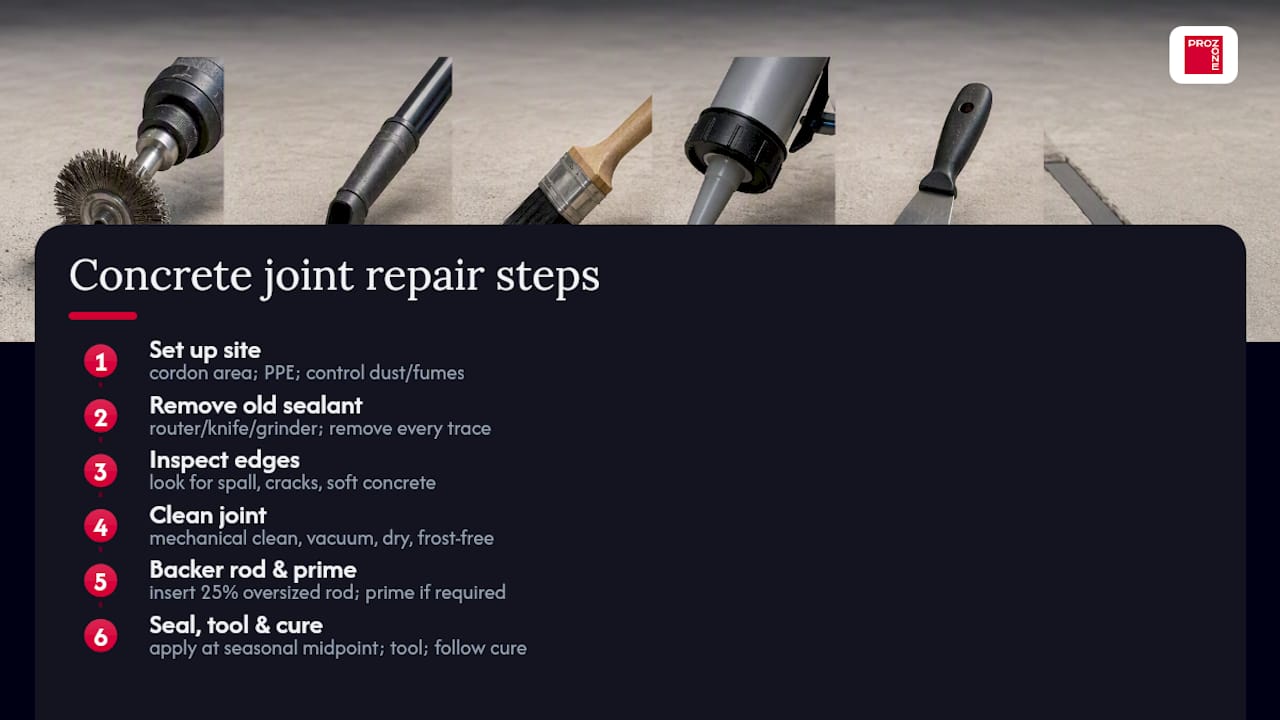
2. Remove the old sealant. Cut it out with a joint router, oscillating knife, or grinder fitted with a joint-cleaning wheel. Get every trace of the old material off the joint faces. Any remnant left behind becomes a bond breaker for the new sealant, and this is where rushed jobs go wrong most often.
3. Inspect the joint faces and adjacent slab edges. Look for spalling, cracking, or soft, crumbling concrete along either side. If the edges are sound, proceed. If they’re spalled or chipped, that’s a signal to repair the edge with a polymer-modified mortar before sealing, or to bring in a contractor if the damage runs deep into the slab.
4. Clean the joint to bare, dry, frost-free concrete. Mechanical cleaning, wire brushing, compressed air, or vacuuming, removes dust, old sealant residue, oils, and loose debris. Contamination is invisible to the eye but fatal to sealant adhesion, so don’t skip this step even if the joint looks clean.
5. Set the joint geometry with closed-cell backer rod. Size the rod roughly 25% larger in diameter than the joint width so it friction-fits without adhesive. Push it to the depth that gives you your 2:1 ratio, using a rod-setting tool rather than a screwdriver so you don’t puncture the rod’s skin.
6. Prime only if the product data sheet calls for it. Not every polyurethane needs primer on clean concrete, but porous, older, or previously sealed substrates usually do. Skipping a required primer step is a leading cause of adhesive failure within the first year.
7. Apply the sealant at the joint’s mid-point of expected movement. This is a detail most DIY guides skip entirely. A joint installed and sealed in the heat of July is near its most expanded state. Sealing it then, without accounting for movement, means the sealant gets compressed hard in winter and stretched hard in summer relative to that starting point. Applying at the mid-point of the seasonal movement range, which usually means moderate spring or fall temperatures, reduces the risk of early bond failure after the first full seasonal swing.
8. Tool the sealant immediately after application. Use a dry tooling stick or a soap-and-water solution recommended by the manufacturer to press the bead into full contact with both joint faces and give it a slightly concave finish that sheds water instead of pooling it.
9. Let it cure per the manufacturer’s window before opening to traffic. Cure time depends heavily on temperature and humidity, and rushing this step is the fastest way to introduce voids, tears, or incomplete adhesion into an otherwise correct installation.
For a fuller walkthrough of surface prep and sequencing on larger commercial slabs, Prozoneltd’s step-by-step concrete repair guide covers site-specific staging that residential guides tend to skip.
Which tools and PPE do you need, and when should you schedule the work?
The right tools matter almost as much as the right sealant, and cold-weather scheduling is where a lot of otherwise correct repairs still go wrong.
Tools and cleaners:
- Joint router, oscillating multi-tool, or grinder with a joint-cleaning wheel for removal
- Wire brush, compressed air, or shop vacuum for final cleaning
- Backer rod installation tool (a simple roller or blunt-tipped rod works)
- Caulking gun rated for the sealant’s cartridge or sausage-pack format
- Tooling stick and soap solution or manufacturer-approved tooling aid
- Manufacturer-specified solvent for cleanup of uncured material
PPE:
- Safety glasses for grinding and routing debris
- Nitrile or solvent-resistant gloves for handling sealant and cleaners
- A dust mask or respirator when routing old material, especially indoors
- Hearing protection if using a grinder for extended periods
Cured sealant only comes off mechanically, by cutting or grinding, so uncured material should be cleaned with the manufacturer’s specified solvent while it’s still workable. Trying to solvent-wipe cured polyurethane is a wasted afternoon.
Temperature governs both application and cure. Most polyurethane sealants apply reliably between roughly 4°C and 38°C, and for cold-weather work, preconditioning the cartridge to around 21°C before application keeps the material workable enough to tool properly. Cure time stretches noticeably as temperature drops and humidity falls, so a repair done in October needs a longer wait before opening to traffic than the same repair done in June.
Pro Tip: Schedule joint resealing for spring or fall shoulder seasons whenever the joint condition allows it. That’s typically closest to the mid-point of the joint’s annual movement range, and it gives the sealant a full cure window before the next deep freeze or peak summer heat.
When should you hire a professional for joint repair?
Some joint problems are a weekend project. Others are a liability if handled without the right equipment or engineering judgment, and telling the two apart early saves money.
Call a contractor when you see any of these:
- Spalled or crumbling edges along the joint, which need polymer-modified mortar edge repair before any sealant will bond properly
- Structural cracking that extends from the joint into the slab field, rather than staying contained to the joint itself
- Post-tensioned slabs, where any cutting, drilling, or coring risks striking a tensioned cable
- Joints under heavy wheel loads (loading docks, drive lanes, industrial yards) that need armoured nosings or semi-rigid, traffic-bearing systems rather than a flexible sealant alone
- Joints that have failed more than once in the last two or three years despite proper materials, which usually points to a movement or design issue beyond simple resealing
A professional scope typically starts with edge repair using mortar conforming to recognized ASTM standards for structural patching, followed by correctly sized backer rod and sealant, and in high-load areas, polymer nosing profiles to protect the joint edge from impact and abrasion. This is where certification and code compliance separate a durable repair from a temporary patch: work performed according to Alberta Safety Codes and referencing ASTM C920 and CSA A23.1-19 standards carries a different level of accountability than a generic patch job with off-the-shelf caulking. Prozoneltd’s road construction and joint system work for municipal and commercial clients follows exactly this specification-grade approach.
How long does a repaired joint take to cure before you can use it?
Cure time is where impatience does the most damage to an otherwise correct repair, and it’s also the step most homeowners underestimate.
Most gun-grade polyurethane sealants develop a tack-free surface within a few hours in moderate conditions, but full cure to walk-on and light-traffic readiness generally takes 24 to 72 hours. Vehicle traffic needs longer, often three to seven days, depending on the specific product and ambient conditions. Self-leveling formulations like Sikaflex-1c SL follow a similar window but can be more forgiving on slightly damp concrete during the pour, without changing the required wait before loading.
Temperature and humidity control the pace. Warm, moderate humidity conditions cure fastest. Cold weather slows the chemical reaction that hardens the sealant, sometimes doubling the wait before the joint can handle foot or vehicle traffic. High humidity can help some moisture-cure polyurethanes set faster on the surface, but it doesn’t necessarily speed full-depth cure.
The practical rule: always check the specific manufacturer’s data sheet for the product you’re using rather than assuming a generic 24-hour window applies. A joint sealed in October in Edmonton, at 8°C, is not on the same clock as one sealed in a 22°C July afternoon. Barricade the repaired joint and communicate the closure window clearly if it’s in a shared parking lot, walkway, or loading area, since foot or vehicle traffic on uncured sealant can tear the bond before it ever sets.
What keeps a repaired expansion joint from failing again?
A properly repaired joint isn’t maintenance-free. It’s lower-maintenance, and the difference between a joint that lasts a decade and one that fails in three years often comes down to a few habits.
Inspect twice a year, ideally spring and fall. Spring inspection catches winter damage while it’s still minor. Fall inspection confirms the joint is sealed tight before the next freeze-thaw season starts. Look for the same failure signs covered earlier: brittleness, gaps widening, edge chipping.
Keep de-icing chemicals to a minimum near sealed joints, and where possible, choose products formulated to be gentler on concrete rather than straight rock salt, which accelerates the chloride exposure that drives rebar corrosion. A concrete-safe ice melt reduces that chemical load on a freshly repaired joint through its first few winters.
Clear debris out of joints regularly. Sand, gravel, and organic debris trapped in a joint hold moisture against the sealant and can physically wedge it, reducing its ability to move freely with the slab.
Reseal proactively, not reactively. Most polyurethane sealants have a realistic service life of eight to twelve years depending on exposure and traffic, and resealing before visible failure costs far less than repairing water damage that’s already reached the base course. Prozoneltd’s concrete maintenance checklist is a useful reference point for building that inspection habit into a facility’s annual calendar.
What does concrete expansion joint repair typically cost?
Budgeting for joint repair depends heavily on scope, but the ranges follow predictable patterns based on what’s actually being replaced.
Simple resealing of an existing, structurally sound joint, removal, cleaning, backer rod, and sealant, is the lowest-cost repair category, priced per linear foot for larger commercial runs or as a flat service call for a short residential joint. Costs climb once edge spalling requires polymer-modified mortar repair before sealing, since that adds material, labour, and cure time to the job. Joints requiring full replacement of the joint system, including new backer rod sizing, primer, and in some cases nosing profiles for heavy-load areas, sit at the higher end of the range.
Several factors move the number: joint length and total linear footage, accessibility (a driveway joint is simpler than a loading dock joint under active traffic), the extent of edge damage discovered once old material is removed, and whether the work needs traffic control or off-hours scheduling for a commercial property.
The most expensive outcome, by a wide margin, is deferring the repair until water has already reached the sub-base or corroded reinforcing steel. What started as a joint resealing job becomes a slab section replacement, at a cost multiple of the original repair. Budgeting for early joint maintenance is consistently the cheaper path over a property’s lifetime, which is exactly the logic behind treating joint sealing as preventive rather than reactive work.
What ProZone sees most often in freeze-thaw failures
The mistake we see most in the field isn’t a bad sealant choice. It’s skipping the backer rod sizing step, or using whatever rod is on the truck instead of the one that actually delivers a 2:1 ratio for that specific joint width. That single shortcut accounts for a disproportionate share of the repeat failures we’re called in to fix.
The second most common issue is timing: sealing a joint at its most expanded or most compressed point rather than near its movement mid-point, which sets the repair up to fail on the very first hard seasonal swing. Edmonton’s freeze-thaw cycle doesn’t forgive that kind of shortcut the way a milder climate might.
Warranty-grade work means specifying materials to their data sheets, not to habit, and building inspection into the maintenance calendar rather than waiting for visible failure. That’s the standard we hold every joint repair to, residential or municipal.
— CSolution
Get a free estimate on your concrete joint repair
Generic patch jobs and off-the-shelf caulking tubes handle a hairline crack for a season, but they’re not built for repeated freeze-thaw cycles or heavy traffic loads. Prozoneltd specifies every joint repair to manufacturer data sheets and Alberta Safety Codes, using closed-cell backer rod sized to the correct 2:1 ratio and traffic-grade polyurethane systems rather than whatever product happens to be cheapest that week.
An estimate includes a full joint inspection, identification of any edge spalling or structural risk, and a scope that covers everything from simple resealing to full joint system replacement with warranty-grade materials. For commercial and municipal projects, lead times depend on scope and season, but early scheduling before peak freeze-thaw exposure gets the best results.
Use the online contact form or call Prozoneltd directly to book a free estimate before the next freeze-thaw cycle finds the weak point in your joints for you.
Sources
- Sikaflex® Construction Sealant
- Backing rods: choosing between open-cell and closed-cell
- Joint & Crack Sealing: Concrete Alberta
FAQ
How can I repair concrete expansion joints?
Remove the old sealant, clean the joint to bare concrete, install closed-cell backer rod at a 2:1 width-to-depth ratio, then apply a traffic-grade polyurethane or self-leveling polyurethane and tool it before it cures.
What is the best filler for concrete expansion joints?
Traffic-grade polyurethane sealants, including self-leveling formulations like Sikaflex-1c SL and W. R. Meadows HS-1 SL, are the standard filler for horizontal, traffic-bearing expansion joints because they retain flexibility through freeze-thaw movement.
Should you fill concrete expansion joints?
Yes. Sealed joints keep water and de-icing chlorides out of the sub-base and away from reinforcing steel, which is one of the most cost-effective preventive measures against structural deterioration.
What can I use for a concrete expansion joint?
Use a closed-cell polyethylene backer rod to set the correct depth, followed by a polyurethane or self-leveling polyurethane sealant rated for the joint’s expected movement, typically in the 25% to 35% range.
Is crack sealing the same as crack filling?
No. Crack sealing uses a flexible material designed to move with the joint and is meant for active cracks, while crack filling uses a more rigid material for cracks that have stopped moving, and using the wrong one accelerates failure.