
Spalled concrete needs either a partial-depth repair by a qualified contractor or a careful, saturated surface-dry (SSD) patch. Cosmetic scaling can often be fixed with a surface patch and a breathable sealer. Call a professional the moment you see exposed rebar or a damaged area deeper than what is generally considered a minor shallow depth.
Spalling is the flaking or breaking away of the concrete surface, distinct from scaling, which is shallower and looks more like peeling paint than a crater. Run this quick triage before you pick up a trowel:
- Hollow sound when tapped? That signals delamination beneath the surface, not a simple patch job.
- Rebar visible or rusted? Stop. This is a structural concern requiring professional assessment.
- Depth under 20 mm with no exposed steel? A DIY surface repair is usually appropriate.
Quick reference: Repairs under a moderate shallow depth generally need a bonding agent or a product engineered specifically for thin patches, since standard concrete shrinks and debonds at shallow depths, per the USBR concrete repair guide. If your situation falls outside these bounds, Prozoneltd can assess the damage and recommend the right fix.
Table of Contents
- What does concrete spalling repair actually require in the field?
- When is a DIY patch safe versus a scheduled repair?
- How do you repair a partial-depth concrete spall correctly?
- Which tools and repair products should you actually use?
- How do you prevent spalling from coming back?
- What does ProZone see most often in failed repairs?
- Get a free assessment and estimate from ProZone
- Sources
- FAQ
What does concrete spalling repair actually require in the field?
Before you decide on a repair method, you need to know what you are actually looking at. Spalling, scaling, delamination, and popouts are four different failure modes, and each demands a different fix.
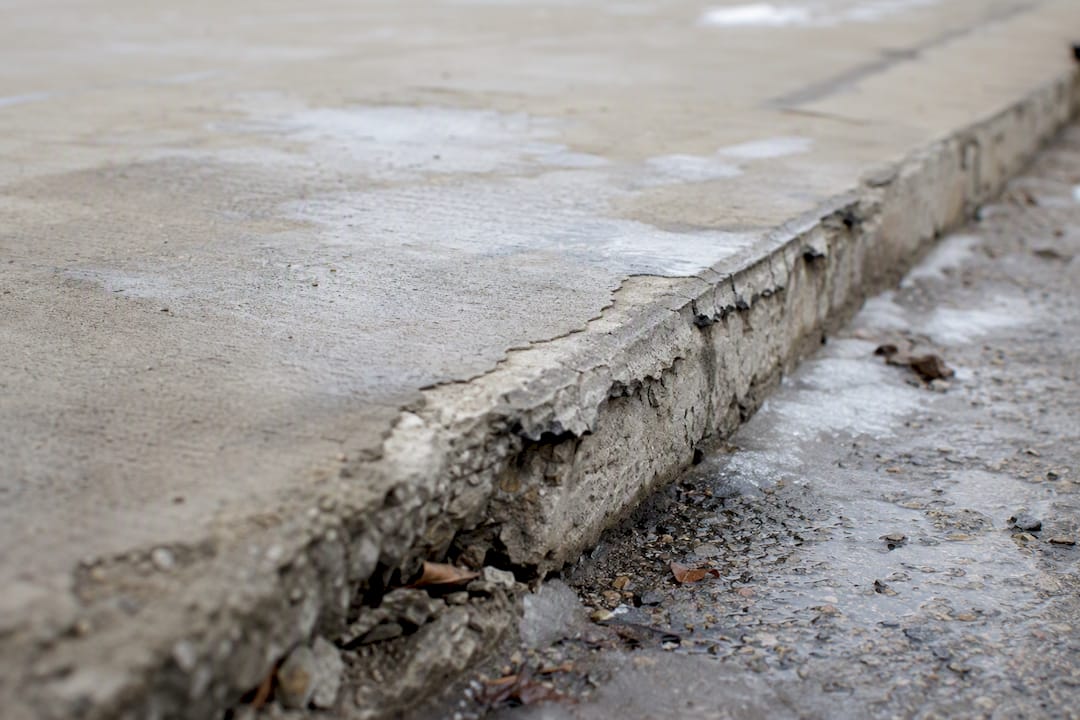
Spalling is a chunk of concrete breaking away, often exposing aggregate or rebar underneath. Scaling is thin, shallow flaking of the surface paste layer, typically under 6 mm deep, usually from freeze-thaw cycling or de-icing salts. Delamination is a hidden horizontal crack below the surface, invisible until the top layer eventually spalls off. Popouts are small, cone-shaped craters caused by a single reactive aggregate particle expanding near the surface.
Here’s a practical field sequence:
- Look at the depth and aggregate exposure. Scaling exposes fine aggregate only; spalling often exposes coarse aggregate or steel.
- Run the tap test. Strike the surface with a hammer or steel rod. A dull, hollow sound over a wide area indicates delamination underneath sound-looking concrete.
- Try the credit-card flake test on scaled surfaces. If a card edge can lift flakes without resistance, the damage is active and surface-only.
- Read the pattern. Random surface pitting near joints and low areas usually points to freeze-thaw or de-icing salt exposure. Damage concentrated over rebar lines strongly suggests chloride-driven corrosion. Map-cracking with popouts across a slab often traces back to a poor original finish or reactive aggregate.
- Escalate when the cause is unclear or liability is on the line. Coring, petrography, and chloride profiling settle root-cause questions that visual inspection cannot, which matters when a warranty claim or dispute is on the table, according to guidance from Materials Lab.
Pro Tip: Never patch over an area that sounds hollow. Delaminated concrete will spall again within a season or two if the underlying crack isn’t fully removed first.
When is a DIY patch safe versus a scheduled repair?
Not every spall demands an emergency callout. The USBR’s own concrete repair guidance notes that superficial damage can often be scheduled rather than repaired immediately, provided it isn’t affecting safety or structural performance. The judgment call comes down to a handful of markers.
Force a professional call when you see any of the following:
- Exposed, corroded rebar. Rust expands roughly six to ten times the volume of steel, which is what fractures the concrete around it in the first place.
- Movement in a structural slab, such as a suspended parking deck or loading dock.
- Rapid progression, where a small patch has doubled in size over a month or two.
- Any area where liability or a warranty claim could be disputed, since documented lab testing carries far more weight than a verbal opinion later.
A surface patch on shallow scaling might last a season or two. A properly executed partial-depth repair, done to spec, should last the remaining life of the slab. Budget-wise, expect professional partial-depth work to run well beyond the cost of a DIY bag mix, but a rushed patch that fails in twelve months costs more in the long run than doing it right once.
How do you repair a partial-depth concrete spall correctly?
This is the procedure a qualified crew follows for anything beyond cosmetic scaling. Skipping steps here is exactly why so many patches fail within a single Edmonton winter.
- Sawcut the perimeter to a minimum depth of about 12 to 20 mm, forming a clean, square edge instead of a feathered one. Feathered edges are the number one cause of edge cracking and re-spalling.
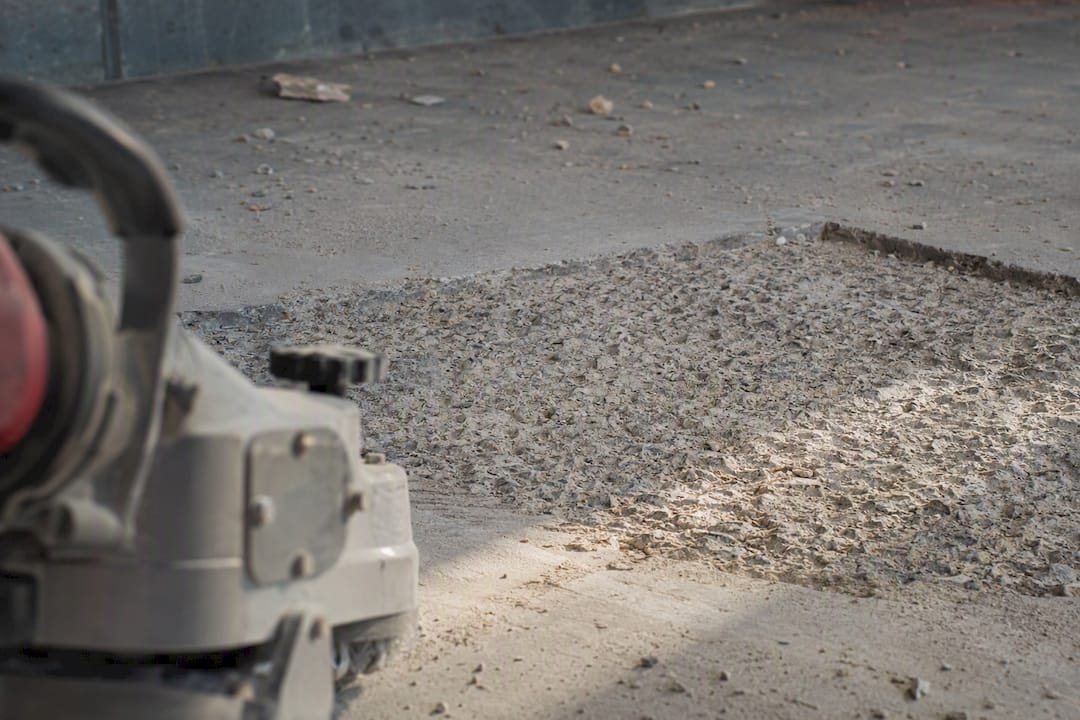
- Remove all unsound concrete back to solid, non-hollow material. Sound and hydrodemolition, jackhammers, and hand tools all work depending on scale.
- Target the right surface profile. For large or partial-depth areas, shot-blasting or hydrodemolition is preferred over hand-chipping because it leaves a mechanically sound, properly profiled substrate without micro-fracturing, per ACI RAP Bulletin 7.
- Inspect and treat exposed rebar. Clean corrosion off with wire brushing or abrasive blasting, undercut the steel by at least 20 mm behind it to allow full encasement, and consult a structural engineer if more than 25% of the bar’s cross-section has corroded away.
- Bring the substrate to SSD (saturated surface-dry) immediately before placement. This is the single most overlooked step in failed repairs.
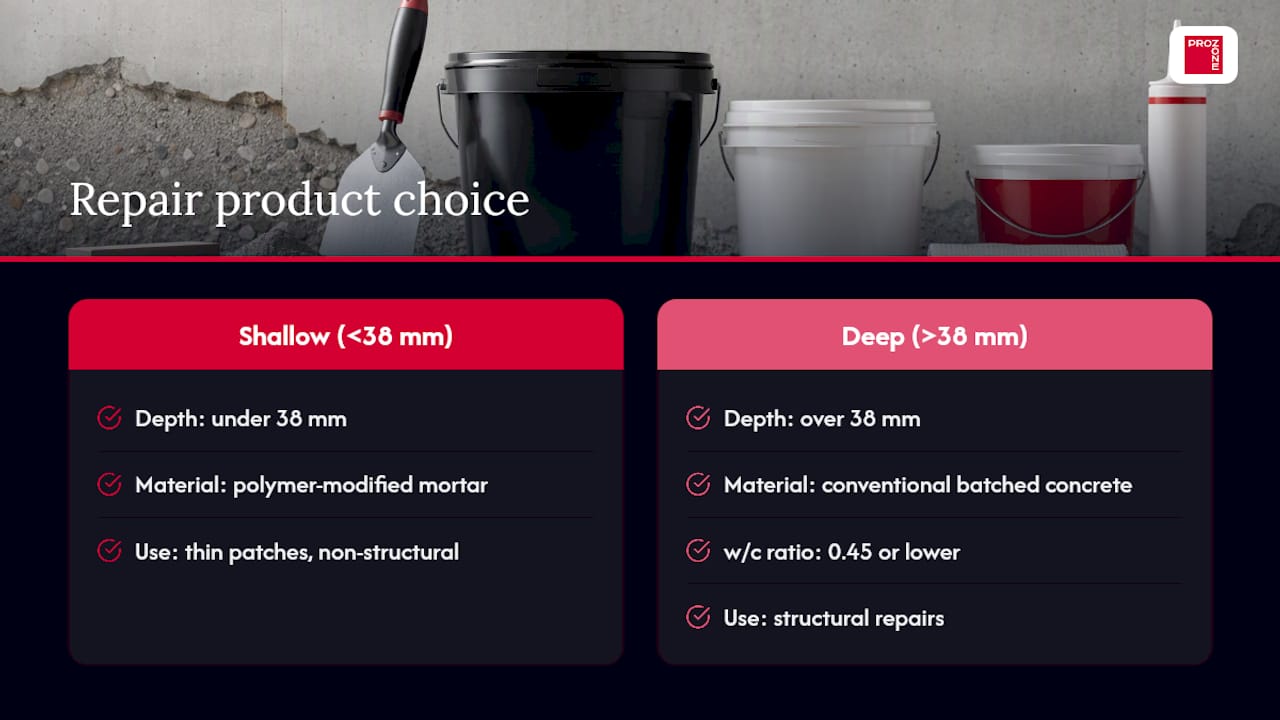
- Select the repair material based on depth. Thin patches under about 38 mm generally need a polymer-modified mortar or a product engineered for shallow application; deeper repairs can use conventional batched concrete with a low water to cementitious materials ratio (w/cm), targeting a ratio suitable for durability as recommended by industry guidance.
- Place, consolidate, and finish without overworking the surface, then apply curing compound or wet burlap immediately.
- Protect the cure. Maintain moist curing for a minimum of seven days, longer in cold shoulder-season temperatures, before allowing traffic.
- Verify bond strength. A pull-off test should read above 1 MPa (roughly 150 psi) for a reliable repair; results under 0.7 MPa call for a procedural review.
Pro Tip: SSD means damp, not wet or puddled. Bone-dry substrate pulls moisture out of the new mortar before it can cure properly, and standing water dilutes the bond coat. Both cause the same early failure.
Surface preparation quality is widely regarded by repair professionals as the single largest predictor of how long a patch lasts, with a mechanical profile around CSP 6 commonly targeted for reliable bonding on structural work. If you’re also dealing with active cracking around the spall, our guide to cost-effective crack repair covers when a crack needs to be addressed before or alongside spall work.
Which tools and repair products should you actually use?
Equipment choice depends almost entirely on the size and depth of the damaged area, not personal preference.
For prep work, small residential spalls (under a square metre) usually only need a hand chipping hammer and a wire wheel. Mid-size commercial areas benefit from a scabbler or walk-behind shot-blaster to hit consistent surface profile targets. Anything over a few square metres, or any job near active rebar, is better served by hydrodemolition, which removes unsound concrete without vibration damage to the surrounding sound material.
On material selection, keep it simple:
- Polymer-modified mortars for shallow, high-traffic patches where fast turnaround matters.
- Fast-set repair products for areas that must reopen to traffic within hours.
- Conventional batched concrete for deep structural repairs where full-depth strength matters more than speed.
Before buying anything, check the product data sheet for compressive strength, shrinkage values, minimum and maximum application temperature, recommended substrate condition, and compatibility with the existing concrete. Once a repair has cured, a breathable penetrating sealer, silane or siloxane, protects against future chloride ingress without trapping moisture inside the slab. Apply sealers only to a clean, dry surface, typically waiting at least 28 days after fresh concrete placement, per Materials Lab guidance. A local concrete cleaning service can prep the surface properly if the slab has years of grime and salt residue built up before sealing.
How do you prevent spalling from coming back?
Prevention comes down to controlling three things: what goes into the mix, how it’s placed, and how it’s treated every winter afterward.
- Specify air-entrainment correctly. Alberta guidance targets 5% to 8% air content and a w/cm ratio of 0.45 or lower for concrete exposed to freeze-thaw cycles, according to Concrete Alberta. Entrained air gives water somewhere to expand into during freezing instead of fracturing the paste.
- Time the finish correctly. Overworking or trowelling too early drives air and water to the surface, weakening exactly the layer that takes the most abuse.
- Avoid de-icing salts on new concrete for at least the first winter. Use clean sand for traction instead.
- Inspect annually before winter, checking for hollow-sounding areas, hairline map cracking, and joint sealant failure, since catching delamination before it spalls is far cheaper than repairing the aftermath.
- Keep records of repair dates, products used, and sealer application cycles so you know when a reseal is due, typically every few years depending on traffic and exposure.
Pro Tip: Freeze-thaw damage isn’t a single event, it’s cumulative. A slab that survives ten winters can still fail in its eleventh if entrained air content was marginal from the start.
For a broader seasonal routine, our concrete maintenance checklist lays out inspection timing across the full year, and our notes on protecting asphalt from salt damage apply the same logic to adjacent paved surfaces.
What does ProZone see most often in failed repairs?
Most repair failures Prozoneltd crews get called to fix trace back to the same two mistakes: skipping proper edge sawcutting and finishing concrete before bleed water has fully left the surface. Both produce a patch that looks fine for a season, then delaminates the following spring.
Our quality assurance approach on every spall repair follows the same checklist regardless of job size: confirmed surface profile before placement, documented SSD condition at time of pour, photo records of exposed rebar condition, and full compliance with Alberta Safety Codes throughout. When a client’s warranty or insurance claim depends on proving root cause, we recommend lab diagnostics like coring or chloride profiling rather than guessing, because a defensible report protects everyone involved. Every crew operates under proper certification and insurance, which matters more than most property owners realize until a dispute actually happens.
Get a free assessment and estimate from ProZone
Prozoneltd is the direct alternative to a patchwork of generic contractors piecing together spall repairs with mismatched materials and no documented QA process. A typical engagement starts with an on-site or photo-based assessment, moves into sawcutting and substrate prep to the correct CSP target, and finishes with material selection matched to your slab’s exposure, whether that’s a residential driveway, a commercial parking structure, or a municipal sidewalk network.
For services beyond spalling, Prozoneltd also handles broader construction services for Edmonton properties, from asphalt to earthworks.
To get a fast, accurate estimate, have these ready before you contact us: clear photos of the damaged area, an approximate square footage, the property location, and a note on whether any rebar is visible. All repair work follows Alberta Safety Codes and uses materials matched to the specific exposure conditions of your site, not a one-size-fits-all mix.
Use the online form or call Prozoneltd directly for a free, no-obligation estimate on your concrete spalling repair.
Sources
- Guide to Concrete Repair (USBR)
- Cold weather concrete reminders: Concrete Alberta
- Concrete scaling vs spalling vs delamination vs popouts (Materials Lab)
FAQ
What is the best product to repair spalled concrete?
There’s no single best product. Shallow patches under about 38 mm generally need a polymer-modified mortar designed for thin applications, while deeper structural repairs call for conventional batched concrete with a w/cm ratio of 0.45 or lower.
How do I fix concrete where the top layer is flaking off?
Flaking, or scaling, is usually shallow and can be repaired by removing the loose material, cleaning the surface, applying a bonding agent if needed, and patching with a polymer-modified surface repair mortar, followed by a breathable silane or siloxane sealer once cured.
How serious is concrete spalling?
Severity depends entirely on depth and cause. Surface scaling from freeze-thaw cycling is cosmetic, but spalling that exposes corroding rebar or affects a structural slab is a safety and durability issue that needs professional assessment.
Can crumbling concrete be repaired?
Yes, in most cases. Partial-depth spalls can be repaired durably by removing unsound material back to a solid substrate, treating any exposed steel, and placing a compatible repair mortar or concrete, though severely deteriorated structural slabs may require full replacement rather than patching.