
TL;DR:
- Crumbling outdoor steps pose significant safety hazards in Edmonton’s harsh winter climate due to poor materials, base depth, or drainage issues. Proper site assessment, durable materials like concrete or natural stone, and correct base preparation are essential for long-lasting, safe landscaping steps. Regular maintenance and professional guidance help ensure these steps withstand freeze-thaw cycles and seasonal wear for decades.
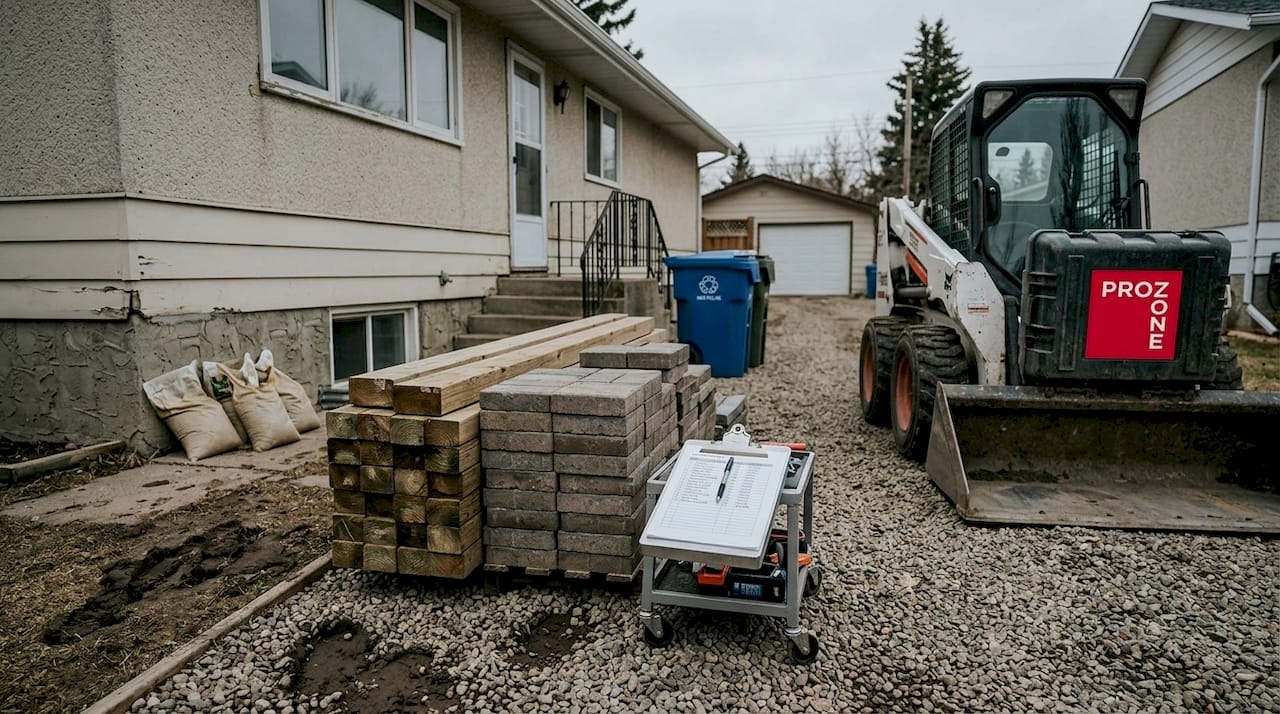
Crumbling, uneven outdoor steps are more than an eyesore. They are a genuine safety hazard, especially when Edmonton winters coat every surface with ice and packed snow. Many property owners discover too late that their steps were built without the right materials, base depth, or drainage, and by spring they are dealing with cracked risers, sunken treads, and wobbly edges that shift with each freeze-thaw cycle. This guide walks you through every phase of a landscaping steps project, from evaluating your site and choosing climate-appropriate materials to laying a solid base and keeping your steps looking great for decades.
Table of Contents
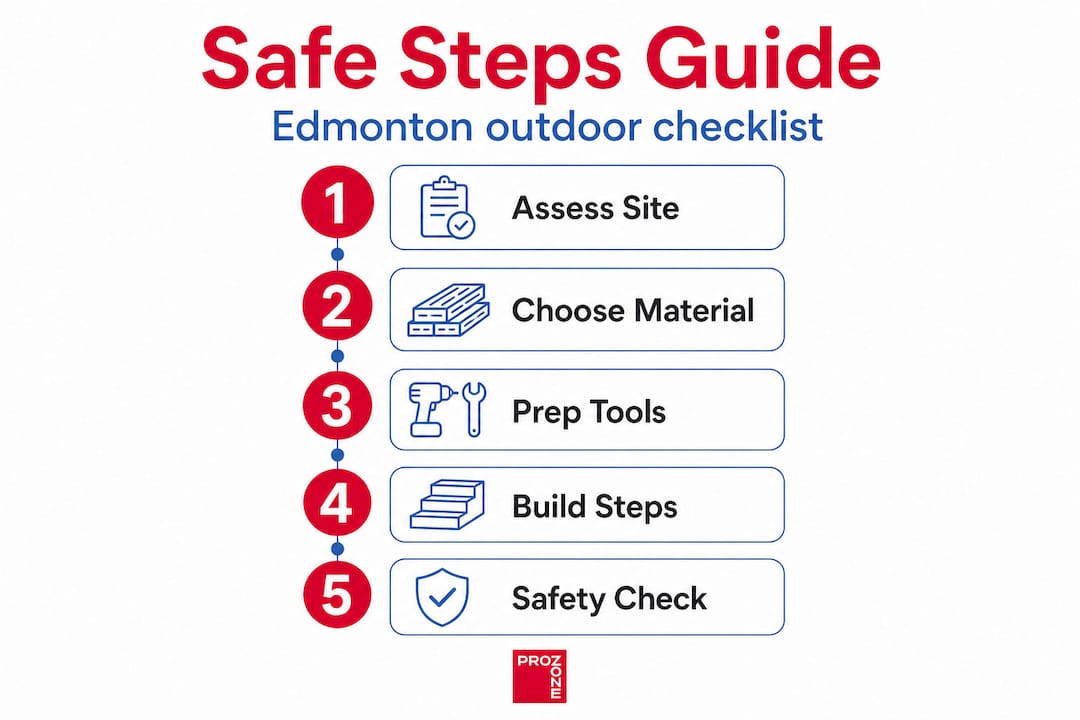
- Assessing your space and planning your landscaping steps
- Choosing the right materials for outdoor landscaping steps
- Tools and materials checklist
- Step-by-step: Building outdoor landscaping steps
- Final checks, maintenance, and troubleshooting
- A professional perspective on landscaping steps in Edmonton
- Professional landscaping solutions for Edmonton property owners
- Frequently asked questions
Key Takeaways
| Point | Details |
|---|---|
| Proper planning is key | Assess your slope, drainage, and code requirements before breaking ground for landscaping steps. |
| Material choice matters | Select weather-resistant materials like concrete or stone for lasting, safe steps in Edmonton. |
| Follow proven installation steps | Careful excavation, base prep, and attention to detail ensure stable, level outdoor steps. |
| Regular maintenance pays off | Seasonal inspection, cleaning, and repairs extend the life and appearance of your landscaping steps. |
Assessing your space and planning your landscaping steps
Let’s kick off by examining what you need to evaluate before you start building. Rushing into a steps project without a proper site assessment is the single fastest way to waste money and redo the job in two years. Edmonton’s soil, drainage patterns, and seasonal temperature swings all directly affect how your steps will perform.
Start with slope and drainage. The grade of your yard determines how many steps you need and how each tread must be pitched. A slope greater than 30 percent typically requires professional engineering input because the lateral pressure on each step riser becomes significant. Poor drainage is equally problematic. If water pools at the base of your steps or runs directly across the treads, you will accelerate erosion, heaving, and surface cracking.
Before you break ground, work through these key questions:
- What is the total rise (vertical height from bottom to top) of the area the steps must span?
- Where does stormwater naturally flow on your property?
- Will the steps carry light foot traffic, heavy regular use, or equipment?
- Do your steps connect to a public sidewalk, driveway, or city-owned curb?
- Are there buried utilities you need to locate before excavating?
For most residential properties in Edmonton, steps placed along garden beds, entryways, or yard terraces fall under general landscaping work. However, steps that connect to a public right-of-way, steps exceeding 600mm (about 24 inches) in total rise, or any work near retaining walls may require a permit from the City of Edmonton. Always check before you dig. Reviewing outdoor material installation tips before finalizing your plan can also help you anticipate common site challenges.
Pro Tip: If your slope exceeds 45 degrees or the steps will see heavy foot traffic (think a main entryway rather than a garden path), bring in a professional to assess the base requirements. A few hundred dollars in consultation fees can save you thousands in rebuilds.
Choosing the right materials for outdoor landscaping steps
Once you’ve scoped your project, pick a material that matches your goals and weather demands. Edmonton sits in climate zone 5b, which means temperatures regularly drop to minus 30 Celsius and the ground can freeze to a depth of nearly 1.5 meters. Materials that perform well in mild climates will crack, rot, or heave in these conditions.
Here is a direct comparison of the four most common step materials used in Edmonton:
| Material | Durability | Cost (approx. per step) | Slip resistance | Maintenance | Best use |
|---|---|---|---|---|---|
| Poured concrete | Excellent | $80–$150 | Moderate (can be textured) | Low | High-traffic entryways |
| Natural stone | Excellent | $100–$250 | High (natural texture) | Low to moderate | Garden paths, feature steps |
| Modular block | Good | $60–$120 | Moderate | Low | Retaining walls, terraces |
| Untreated wood | Poor | $40–$90 | Low when wet | High | Temporary or low-traffic only |
Natural stone and poured concrete are clearly the top performers in Edmonton’s climate. Both materials tolerate repeated freeze-thaw cycles without significant degradation when installed on a proper base. You can explore best Edmonton step materials to see specific product options suited to northern Alberta conditions.
When selecting your material, focus on these properties:
- Freeze-thaw resistance: Materials must absorb minimal water to avoid cracking when that water expands as it freezes.
- Slip resistance: Smooth finishes become dangerous in winter. Textured concrete, rough-cut stone, or added aggregate surfaces add meaningful grip.
- Drainage capacity: Each tread should pitch forward slightly (about a 2 percent slope) so water sheds off rather than pooling.
- Weight and compaction: Heavier materials stay put better, but they also demand a stronger, deeper base.
For edging along your steps and the surrounding garden beds, look at landscape edging options to keep borders clean and prevent material migration. If you want a natural, warm look alongside concrete or block steps, incorporating decorative limestone as a border or infill material adds both visual interest and good drainage.
Pro Tip: Untreated wood may look appealing in the store and on design blogs, but in Edmonton it will swell, rot, and become dangerously slippery within three to five years. If you love the look of wood, invest in pressure-treated timber rated for ground contact or use composite decking materials designed for outdoor steps.
Tools and materials checklist
With your design and materials chosen, collecting the right tools is crucial. Showing up mid-project to realize you are missing a plate compactor or the right fasteners will cost you time and potentially compromise the quality of your base preparation.
Essential and optional tools for landscaping steps:
| Tool | DIY install | Pro install | Purpose |
|---|---|---|---|
| Tape measure and level | Required | Required | Measuring rise and run, checking alignment |
| Spade and mattock | Required | Required | Excavation and rough shaping |
| Plate compactor | Required | Required | Base compaction |
| Rubber mallet | Required | Required | Setting stone or block |
| Circular saw (masonry blade) | Optional | Required | Cutting stone or block to size |
| Concrete mixer | Optional | Required | Poured concrete steps |
| String line and stakes | Required | Required | Layout and alignment |
| Wheelbarrow | Required | Required | Moving materials |
| Hand tamper | Optional | Optional | Spot compaction in tight areas |
Quality garden step stakes are worth buying rather than improvising. Accurate string lines set from solid stakes are what keep your steps level and evenly spaced as you build each course from the ground up. For ordering and transporting bulk materials such as gravel, sand, and stone, check out landscaping material pallets to get your supplies delivered in an organized, cost-effective format.
Safety gear you should never skip:
- Safety glasses or goggles when cutting or chipping stone and concrete
- Heavy-duty work gloves to protect against sharp edges and abrasives
- Steel-toed boots for any work around heavy stone or block
- Knee pads for extended periods of bending during laying work
- Dust mask or N95 respirator when cutting masonry materials
- High-visibility vest if working near a road or driveway
Sourcing materials locally in Edmonton saves on freight costs and lets you inspect materials before they arrive on site. Most builders’ supply yards in the Edmonton area stock compaction gravel (also called road crush or class II base), sharp sand, and landscaping stone. Buying locally also means faster restocking if you underestimated quantities.
Step-by-step: Building outdoor landscaping steps
Equipped with materials and tools, now follow this process for reliable results. The steps below apply to most residential landscaping step projects in Edmonton, whether you are working with natural stone, concrete block, or poured concrete.
-
Mark your layout. Use stakes and string lines to define the outer edges of each step. Measure the total rise and divide it by your planned riser height (ideal range is 150mm to 180mm, or about 6 to 7 inches) to determine how many steps you need.
-
Excavate the staircase footprint. Dig out the entire area where steps will sit, removing all topsoil and organic material. For Edmonton’s frost depth, excavate at least 400mm (roughly 16 inches) below the finished surface level to minimize frost heave risk.
-
Add and compact your gravel base. Fill the excavated area with compaction gravel in 75mm (3-inch) layers, compacting each layer thoroughly with your plate compactor before adding the next. A final base depth of at least 150mm (6 inches) of compacted gravel is the minimum; 200mm is better for high-traffic steps.
-
Set a drainage slope. Before placing any step material, ensure the base pitches gently away from any structures or public walkways. Even a 1 to 2 percent forward pitch on each tread surface is enough to shed water effectively.
-
Lay your first (bottom) course. For stone or block steps, start with the lowest step and work upward. Place the material onto a thin bed of sharp sand or mortar depending on your chosen system. Check for level across the width and the planned pitch front to back.
-
Build up each subsequent step. Overlap each riser by at least 25mm (1 inch) onto the back of the tread below to lock courses together. This overlap also prevents debris and ice from getting between steps and causing shifting.
-
Fill gaps and joints. For natural stone steps, fill joints with polymeric sand, which locks together when wetted and resists weed growth and ant erosion. For poured concrete steps, follow standard formwork and curing procedures, keeping concrete moist for at least 7 days after pouring.
-
Finish the surface. Broom-finish concrete for grip or seal stone surfaces with a breathable masonry sealer that allows moisture vapor to escape, which prevents spalling (surface flaking caused by trapped moisture freezing). For more technical guidance on poured concrete work, the installation guide and driveway pour techniques article offer detailed concrete-specific instruction.
Safety and compliance checkpoint: Before you complete the final surface, verify that your total step height meets the Alberta Building Code standard of no more than 200mm per riser and no less than 125mm. Tread depth (the flat part you step on) must be at least 250mm. Steps that deviate from these standards create a trip hazard and may fail a city inspection.
Pro Tip: Edmonton’s ground moves. Even a well-built step system may shift slightly over the first one or two winters as the base settles. Build with materials and jointing systems that allow minor corrections without requiring full demolition. Natural stone set in sand is much easier to relay than poured concrete when frost heave causes slight displacement. If your existing concrete steps are already damaged from past seasons, the concrete step repair guide walks you through assessing and patching common damage.
Final checks, maintenance, and troubleshooting
After installing your steps, a few important checks and routines will keep them safe and looking great for many seasons ahead. A fresh installation looks impressive, but it is the first winter and spring thaw cycle that truly tests your work.
Final inspection checklist:
- Verify each tread pitches forward by 1 to 2 percent (use a level and measure the gap at the back versus the front edge)
- Confirm riser heights are consistent. Uneven risers are a leading cause of trips and falls
- Test each step for stability by standing on the outer corners and applying lateral pressure
- Check that all joints are fully packed with polymeric sand or mortar and there are no hollow spots
- Confirm the base of the steps meets the existing grade cleanly, with no gaps or lips that could catch water
Maintenance by material type:
- Concrete steps: Inspect each fall and spring for surface cracks or spalling. Clean with a stiff brush and reapply a breathable penetrating sealer every two to three years. Avoid using metal shovels directly on concrete surfaces in winter.
- Natural stone steps: Clear fallen leaves and debris promptly because organic material holds moisture against the stone surface and accelerates weathering. Re-sand polymeric joints every three to five years or whenever you see joint erosion or ant activity.
- Modular block steps: Check for any individual blocks that have shifted or rocked. Resetting a single block early prevents progressive movement that can destabilize an entire course.
Common problems and quick fixes:
If a tread surface has sunken slightly, lift the stone or block, add compacted sand or fine gravel to the base, and relay. If you notice cracking in a poured concrete step, determine whether it is surface-level or structural. Surface cracks under 3mm wide are cosmetic and can be filled with a flexible concrete repair caulk. Wider cracks or cracks that run through the full depth of the step require assessment before patching. For step-by-step guidance on restoring damaged concrete, check out the repair chipped steps resource.
During winter, use sand or fine gravel as a traction agent rather than rock salt or chemical de-icers. Rock salt accelerates surface erosion on both concrete and stone by drawing moisture into the material and promoting repeated freeze-thaw cycles.
Pro Tip: If you notice that multiple steps have shifted simultaneously, or if there is a pattern of cracking appearing in the same location season after season, this is a sign of a base failure rather than a surface problem. Patching the surface will not solve the underlying issue. Call a professional for an assessment before investing more money in repairs.
A professional perspective on landscaping steps in Edmonton
Now that you understand the technical process, here is what experienced contractors see homeowners and DIYers miss most in Edmonton. And honestly, it rarely comes down to which material someone picked. It comes down to base preparation and drainage, every single time.
The most common mistake we see is undercutting the base depth to save on labor and gravel. A homeowner spends $800 on beautiful natural stone and then saves $200 by only digging 100mm instead of 400mm. Two winters later the steps have moved, and the stone needs to come up anyway. The base is invisible once the steps are built. That is exactly why so many people undervalue it.
There is also a persistent misconception that the cheapest materials just need more maintenance. In Edmonton, some materials are not worth using outdoors at all, regardless of how carefully you maintain them. Untreated wood, unsealed porous stone, and thin decorative tiles are not bad products in the wrong setting. They are the wrong product for this climate, full stop.
What experienced contractors also see repeatedly is that homeowners focus intensely on the appearance of their steps during construction and almost entirely ignore drainage. A beautiful set of stone steps that channels water toward a house foundation is a liability, not an asset. The pitch of each tread, the grade of surrounding soil, and where water flows after a heavy rainfall or snowmelt should be planned before the first shovel goes into the ground.
Finally, if you are going to invest in quality professional landscaping supplies, use them correctly. A premium polymeric joint sand installed incorrectly over dusty, dry stone will wash out in the first rainfall. Following manufacturer curing times, wetting procedures, and compaction requirements matters. The material quality is only half the equation. Installation technique is the other half, and in Edmonton’s climate there is no margin for cutting corners on either.
Professional landscaping solutions for Edmonton property owners
For those wanting expert support or high-quality materials, ProZone Ltd. can help you achieve beautiful, safe landscaping steps that stand up to Edmonton’s demanding climate. Whether you need bulk supply of base gravel, quality stone, or edging materials, the Edmonton landscaping supplies catalog has what you need to start and finish your project with the right products. If you want guidance on which materials suit your specific project conditions, the Edmonton outdoor materials page breaks down performance characteristics by material and application. ProZone Ltd. also offers professional installation and sidewalk and curb repair services for property owners who want durability and compliance guaranteed from the start. Contact us today for a project quote.
Frequently asked questions
What is the best material for outdoor landscaping steps in Edmonton?
Concrete and natural stone are top choices due to their durability and resistance to freeze-thaw cycles common in Edmonton. Both materials tolerate repeated temperature swings far better than wood or thin tile.
How deep should the base be for landscaping steps?
A compacted gravel base of at least 4 to 6 inches is recommended beneath steps to prevent sinking and frost damage. In Edmonton, going deeper to 8 inches is often advisable given the region’s frost penetration depth.
Do I need a permit to build outdoor steps on my property?
Permits may be required, especially if steps connect to a public sidewalk or exceed a certain height. Check with the City of Edmonton directly before starting any steps project that connects to city-owned infrastructure.
How do I keep my landscaping steps safe in winter?
Use slip-resistant materials and regularly clear snow and ice. Avoid rock salt and instead spread fine sand or aggregate for grip without damaging your step surfaces.
What maintenance is needed for outdoor steps?
Clear debris regularly, inspect for cracks or shifting each spring and fall, and reseal surfaces as needed. Addressing small problems early prevents them from becoming expensive structural repairs.