
Prepare the bed so sod contacts 10 to 15 cm of loamy topsoil, drains away from structures at roughly a 3 percent slope, and sits at a pH near 6.0 to 6.5. Skip any of these three targets and you risk shallow rooting, pooling water, or a lawn that struggles through its first freeze-thaw cycle. Done properly, this groundwork is what separates well-established sod from sod that struggles and may fail within the first season.
Table of Contents
- Clear the site of debris and old vegetation
- Grade the area for drainage and correct slopes
- Relieve compaction: tilling, aeration and working depths
- Topsoil, amendments and correct topsoil depth
- Soil testing, pH targets and starter fertilizer guidance
- Final grading, firming and pre-watering before sod arrives
- Install drainage and irrigation at the right stage
- When to hire professionals and how ProZone helps
- Timing considerations for sod installation after soil preparation
- Techniques for edging and creating borders before laying sod
- How to handle soil with poor drainage or compaction beyond tilling
- Project manager checklist: common mistakes and quick verifications
- ProZone contact and services for site prep and sod supplies
- FAQ
- Sources
Clear the site of debris and old vegetation
Every successful sod installation starts with a clean subgrade. Remove existing turf, weeds, roots, and construction debris before any grading begins, because organic material left under new soil will decompose, settle unevenly, and create depressions in your finished lawn.
You have two practical removal paths: mechanical stripping with a sod cutter or skid steer, or herbicide treatment followed by a waiting period. Mechanical removal is faster and avoids chemical use, but herbicide treatment can be more thorough against perennial weed rhizomes that regrow from fragments left behind by blades.
- Mechanical removal: strip the top 2 to 5 cm of existing turf and roots, then haul debris offsite.
- Herbicide approach: apply a non-selective product, wait the labelled period (often 7 to 14 days) before disturbing the soil, and confirm die-back before tilling.
- Call your local utility locate service before digging deeper than a few centimetres, especially near property lines or existing landscaping.
- Probe for buried stumps, old concrete, or construction scraps common on newer builds, since these cause long-term settling problems if left in place.
Grade the area for drainage and correct slopes
Grading is where most sod failures actually begin, long before anyone unrolls a single piece of turf. Rough grading establishes the overall shape of the yard, while finish grading refines the surface to its final contours just before topsoil and sod go down.
Aim for a finished slope of about 3 percent away from foundations, with 1 to 2 percent acceptable on flatter sections where drainage elsewhere handles runoff. Alberta guidance notes that slopes beyond 30 percent become hazardous to mow and dry out too quickly for healthy turf.
- Fill low spots with compatible soil rather than topsoil alone, to avoid future settling mismatches.
- Address steep slopes with terracing or a retaining wall before sodding, rather than trying to hold soil on an unsupported grade.
- Let the rough grade settle for a few days to a couple of weeks, particularly after rainfall, before cutting the finish grade.
Pro Tip: Flood-test suspect low areas with a hose before ordering sod. Standing water after 30 minutes signals a grading fix you want to make now, not after installation.
Relieve compaction: tilling, aeration and working depths
Compacted soil is the enemy of root establishment, and Edmonton-area building sites are frequently compacted by heavy equipment during construction. Loosening the subgrade to a working depth of 10 to 15 cm, deeper where equipment traffic has been heaviest, gives new roots room to penetrate.
Tilling wet soil creates dense clods that resist breakdown for a full season, so wait until soil crumbles rather than smears when squeezed. Over-tilling, conversely, destroys the soil structure you are trying to build and can leave a fine, powdery layer prone to crusting.
- Till or rip compacted zones to the full working depth, then pass again at a slight angle for even mixing.
- Where tilling equipment cannot reach, core aeration or mechanical aerators can relieve shallow compaction.
- Work existing topsoil and any amendments into the loosened layer together, rather than dumping new soil directly on top of undisturbed ground.
Topsoil, amendments and correct topsoil depth
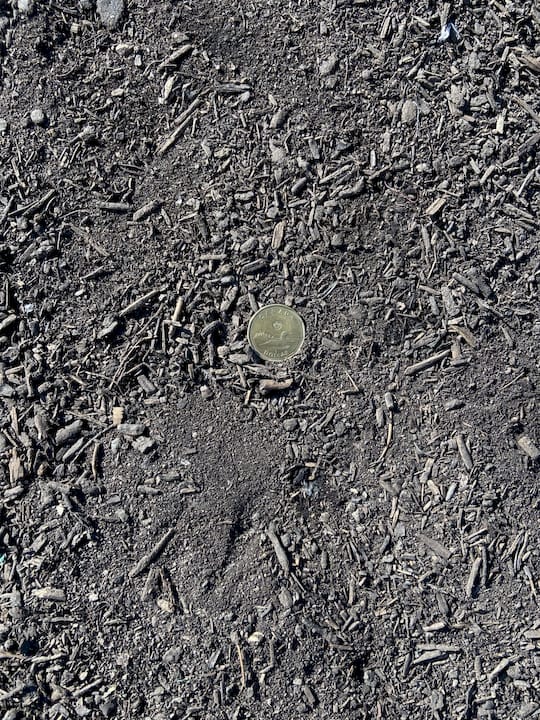
Quality topsoil is the single biggest input cost in sod preparation, and it is worth getting right. Canada.ca’s lawn establishment guidance recommends 10 to 15 cm (4 to 6 inches) of topsoil to support root development and nutrient retention after settling.
10 to 15 cm of quality topsoil, worked into the loosened subgrade, is the baseline every sod installer should hit before ordering turf.
Loam or sandy loam performs best for turf because it balances drainage with water retention, according to Ontario’s lawn establishment resource. Compost improves structure and nutrient content when blended thoroughly, but excessive peat moss can create a spongy, water-logged layer and lower soil pH more than intended.
- Blend imported topsoil into the existing subgrade rather than laying it as a separate layer, which prevents a sharp interface that traps water and restricts root movement.
- Add compost sparingly as an amendment, not as a replacement for topsoil volume.
- Avoid stacking distinct soil types in layers, since both water and roots struggle to cross an abrupt textural boundary.
Soil testing, pH targets and starter fertilizer guidance
Testing before you buy a single roll of sod saves money and prevents a lawn that never quite thrives. Purdue Extension recommends sampling the upper 4 to 6 inches from at least ten locations, mixing the samples, air-drying them, and sending them to a lab at least one month before installation so amendment recommendations can actually be applied in time.
- Pull samples in a zigzag pattern across the yard, avoiding unusually wet or disturbed spots.
- Mix the samples and send them to a soil testing lab, allowing roughly one month for results and planning.
- Target a pH of about 6.0 to 6.5 for most turf species, adding lime to raise pH or elemental sulphur to lower it as the report indicates.
- Apply a starter fertilizer higher in phosphorus to support new root development, following the rate on the product label and any lab recommendation.
Final grading, firming and pre-watering before sod arrives
The last steps before delivery determine whether sod makes full contact with soil or sits on air pockets that dry out and die. Account for sod thickness, typically 2 to 3 cm, when setting your final soil height so the finished lawn sits flush with adjacent sidewalks and driveways.
Firm the bed with a light roller rather than heavy compaction equipment. Purdue Extension’s guidance describes the correct finish as soil that shows faint footprints without sinking deeply, firm enough to support sod but not compacted hard again.
- Pre-moisten the soil a day or two before sod delivery so it is damp, not muddy, at installation.
- Walk the bed yourself before delivery; sinking more than a centimetre signals the ground needs more firming.
- Schedule delivery for the same day as final prep whenever possible, since prepared beds dry out or get rained on if left exposed too long.
Pro Tip: Check soil height against hardscape edges with a straightedge before you order sod, since a 2 cm miscalculation leaves an unsightly lip along every walkway.
Install drainage and irrigation at the right stage
Timing matters as much as placement for underground infrastructure. Install rough drainage lines after rough grading but before final grading and smoothing, so heavy equipment does not crush pipe that is already in place.
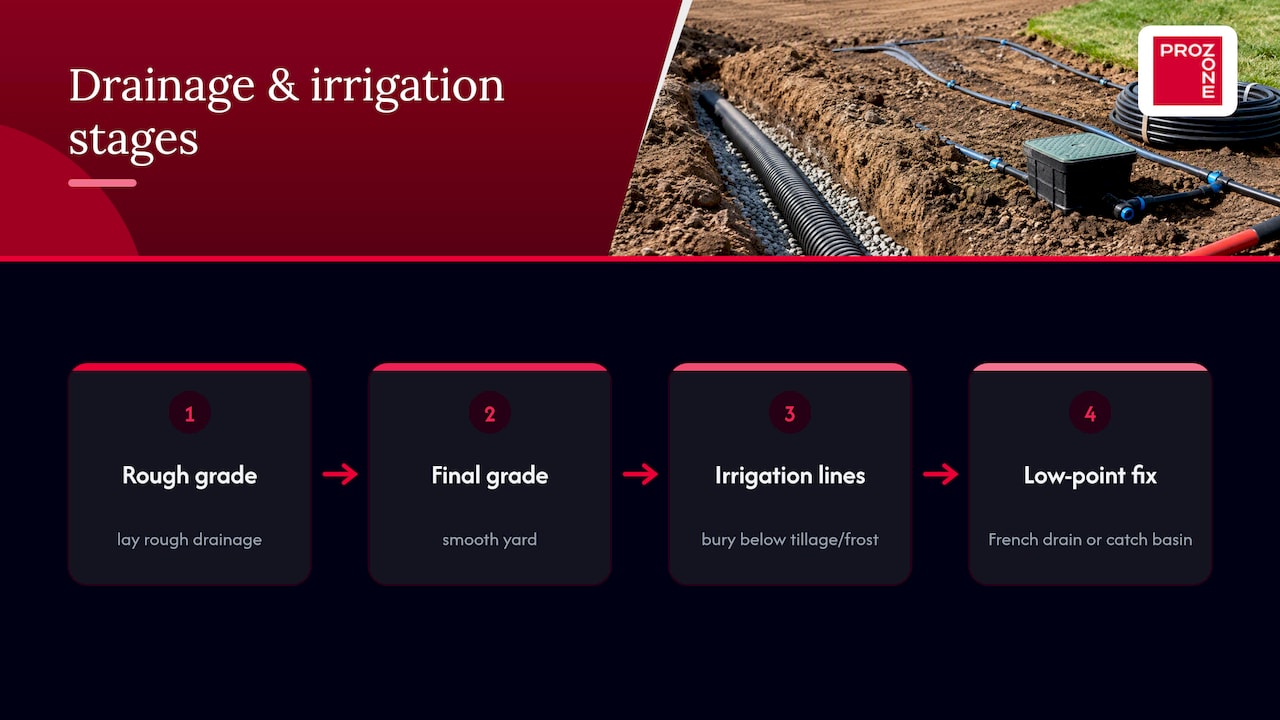
Set irrigation lines below typical tillage depth and below the regional frost line to prevent freeze damage during Edmonton’s winter freeze-thaw cycles. For persistent surface pooling that grading alone cannot resolve, a shallow French drain or additional catch basin at the low point is usually more reliable than regrading an already-finished yard. Our drainage guidance covers these fixes in more detail.
When to hire professionals and how ProZone helps
Some conditions justify bringing in heavy equipment and trained crews rather than a weekend of DIY work. Major grade changes, subsoil compacted by construction traffic, drainage installation, or any project over a few hundred square metres typically call for professional earthworks.
We supply screened topsoil, fresh sod, and provide earthworks and excavation services for local projects, with delivery options available for sites with limited access. Our crews adhere to regional safety standards on every job, and we provide on-site assessments before quoting, so you know the actual scope before committing. A professional estimate typically covers soil volume, grading extent, and material delivery logistics specific to your site. Our project manager’s site-prep guide walks through the sequencing in more detail.
Timing considerations for sod installation after soil preparation
Soil preparation and sod installation are not separated by weeks of waiting in most cases, but the calendar still matters. Fresh sod should go down as soon as possible after final grading and firming, ideally within a day or two, since exposed prepared soil dries out, crusts, or gets compacted by rain before turf ever arrives.
Seasonal timing affects success more than most homeowners expect. Fall installation is often the optimal window for cool-season grasses because root systems develop while soil is still warm and air temperatures drop, reducing heat stress on new roots before winter dormancy. Spring installation also works, but roots have less time to establish before summer heat arrives, which raises watering demands significantly during the first season.
In the Edmonton region specifically, avoid sodding too late into autumn. Roots need several weeks of active growth before the ground freezes, and sod installed just ahead of a hard freeze-thaw cycle can heave or desiccate before it has anchored properly. If your soil test and amendment plan push installation past the ideal fall window, it is often better to prepare the bed fully, protect it with a temporary cover crop or mulch, and sod the following spring rather than rush installation into marginal conditions.
Order sod only once your prepared bed passes the footprint firmness test and moisture check, never before. Sod is a perishable product: rolls left stacked for more than a day or two in warm weather begin to yellow and decompose before they ever touch soil, so confirm your site is genuinely ready before scheduling delivery.
Techniques for edging and creating borders before laying sod
Clean edges give a sodded lawn a finished look and prevent turf from creeping into garden beds or walkways over time. Establish your borders before sod arrives, not after, since cutting edges around already-laid turf risks tearing roots and leaving ragged lines.
A half-moon edger or a powered bed edger cuts a crisp vertical line between lawn and adjacent beds, pavement, or driveways. Cut the edge a centimetre or two outside your intended final line, since sod pieces are easier to trim down than to patch if you have cut too tight.
For a more permanent border, physical edging material such as steel, aluminum, or heavy-duty plastic edging installed along the perimeter keeps grass from spreading into flower beds and simplifies future mowing and trimming. Install this edging after final grading but before sod placement, with the top of the edging flush with or slightly below the finished soil height so mower blades do not catch on it.
Where sod meets a driveway, sidewalk, or patio, check that the finished soil height accounts for sod thickness so the turf sits flush with the hard surface rather than above or below it. A lip in either direction creates a tripping hazard or a spot where mower wheels scalp the new lawn. Along curved beds, lay out a garden hose first to mark the curve, then cut along it for a smooth, professional-looking line rather than an angular approximation.
How to handle soil with poor drainage or compaction beyond tilling
Tilling resolves most compaction problems, but some sites need more. Heavy clay soils that remain compacted even after thorough tilling, or sites with a persistently high water table, call for structural amendment rather than repeated cultivation.
Incorporating coarse sand into heavy clay can improve drainage, but only when added in sufficient volume and mixed thoroughly. A thin layer of sand worked shallowly into clay often does more harm than good, creating a dense, concrete-like layer at the interface between the two materials. If sand amendment is the chosen fix, it typically needs to make up a substantial portion of the top profile, which is a significant volume of material for anything beyond a small area.
Organic matter, specifically well-decomposed compost, is usually a more practical fix for moderate drainage problems. Working compost into the top 10 to 15 cm improves soil structure, encourages aggregation in clay particles, and increases pore space without the risk of creating an impermeable sand-clay layer.
For sites where surface drainage is the real problem rather than soil texture, regrading to increase slope or installing a French drain at the low point often solves the issue more reliably than any amendment. Persistent standing water after heavy rain, even on well-amended soil, usually points to a grading or subsurface drainage problem that needs an engineered fix rather than more organic matter. This is also where a professional site assessment earns its cost, since misdiagnosing a drainage problem as a soil texture problem wastes both material and a full growing season.
Project manager checklist: common mistakes and quick verifications
The costliest mistakes on sod jobs are rarely dramatic: working soil while it is still wet, layering imported topsoil over undisturbed subsoil without blending, or skipping a final check of grade against adjacent pavement. Each one is invisible at installation and expensive to fix once turf is rooted.
Before sod arrives, verify topsoil depth in several spots with a probe, inspect visually for debris the clearing phase missed, and confirm the footprint test passes across the whole bed, not just near the access point.
— ProZone
ProZone contact and services for site prep and sod supplies
Getting soil prep right takes the right equipment, the right materials, and judgment built from seeing how Edmonton’s freeze-thaw cycles punish shortcuts. We supply screened topsoil and fresh sod through our landscape supplies centre, and our earthworks and excavation crews handle grading, compaction relief, and drainage installation for projects of any size.
Every job follows local safety codes, and we start with an on-site assessment so your quote reflects your actual soil conditions rather than a generic estimate. Whether you need a full yard regraded, screened topsoil delivered, or sod supplied for a finished lawn, our services overview covers the scope.
Request a free on-site estimate through the contact page or call directly to schedule an assessment before your next sod project.
FAQ
What is the best soil to put down before sod?
A loamy sandy loam topsoil works best for turf because it balances drainage with water retention better than heavy clay or pure sand. Aim for 10 to 15 cm (4 to 6 inches) of this material worked into the loosened subgrade, not layered on top of it.
Can I just lay sod over dirt?
Laying sod directly over unprepared dirt usually fails because compacted soil blocks root penetration and uneven surfaces trap water in some spots while starving others. Clearing debris, grading for drainage, relieving compaction, and adding proper topsoil first gives roots the conditions they need to establish.
What is the best way to prep the ground for sod?
Clear old vegetation and debris, grade for a gentle slope away from structures, loosen compacted subsoil, add 10 to 15 cm of quality topsoil, and test soil pH before applying starter fertilizer. Firm and moisten the bed just before sod arrives so roots make close contact with soil.
What are some common mistakes people make when laying sod?
The most frequent errors are tilling soil while it is still wet, skipping a soil test and guessing at fertilizer needs, and failing to check that finished grade sits flush with adjacent pavement. Layering new topsoil over undisturbed subsoil without blending the two is another common cause of poor root establishment.