
TL;DR:
- Regular systematic inspections help detect concrete issues early, reducing costly repairs and liability risks.
- Proper tools, checklists, and staff training are essential for effective concrete surface assessments.
- Edmonton’s freeze-thaw cycles make timely inspections in spring and fall critical for preventing major damage.
A small hairline crack in a parking lot sidewalk gets overlooked during a busy month. Six months later, Edmonton’s freeze-thaw cycle has turned that crack into a 3-inch gap with spalling edges, a trip hazard, and a repair bill that’s five times what it would have cost to catch it early. For property and facility managers, that scenario plays out more often than it should. This guide walks you through the standards, tools, and exact steps you need to inspect concrete surfaces systematically, catch problems before they escalate, and protect both your budget and your occupants.
Table of Contents
- Understand the purpose and standards of concrete inspection
- What you need: Tools, checklists, and training for thorough inspections
- Step-by-step guide: Inspecting concrete surfaces on your property
- Avoid common mistakes: What property managers in Edmonton overlook
- Verifying results: From findings to action plans
- The real-world challenge: Why inspections often fall short and what really works in Edmonton
- Get expert help with your next concrete inspection or repair
- Frequently asked questions
Key Takeaways
| Point | Details |
|---|---|
| Early inspections prevent failure | Addressing small concrete issues early can prevent 85-90 percent of major failures and costly repairs. |
| Follow local standards | Using ACI, ICRI, and CSA standards ensures safety and compliance in Edmonton. |
| Use proper tools and checklists | A combination of visual inspection, non-destructive testing, and standardized checklists leads to more accurate results. |
| Prioritize repairs by risk | Not all defects need immediate action but ignoring high-risk issues can damage property and increase liability. |
| Expert help makes a difference | Professional advice and periodic expert inspections augment your team’s routines and add peace of mind. |
Understand the purpose and standards of concrete inspection
Concrete inspection isn’t just a maintenance task. It’s a formal risk management process with real legal weight. The core goals are straightforward: assess durability, identify safety hazards, and trigger repairs before minor defects become structural failures. When you document inspections consistently, you also build a defensible record if a liability claim ever arises.
In Edmonton and across Alberta, inspections should align with three key frameworks. Visual inspection procedures follow ACI 201.1R, surface profile assessments follow ICRI CSP 1-10, and construction quality control testing follows CSA A23.1 for Canadian projects. These aren’t optional guidelines for commercial or municipal properties. They represent the baseline standard of care.
Understanding concrete flatwork basics also helps managers recognize what they’re looking at during inspections. Slabs, sidewalks, and parking surfaces each have distinct failure patterns, and knowing which concrete types were used on your property informs what defects to prioritize.
| Standard | Main focus | Applicable applications |
|---|---|---|
| ACI 201.1R | Visual defect identification | All in-service concrete surfaces |
| ICRI CSP 1-10 | Surface profile and texture | Repair preparation, coatings |
| CSA A23.1 | Material quality and testing | New construction, major repairs |
Regular inspections deliver measurable returns beyond compliance:
- Catch surface defects before freeze-thaw cycles worsen them
- Reduce emergency repair costs by addressing issues at the hairline stage
- Maintain slip resistance ratings on pedestrian surfaces
- Support insurance documentation and liability defense
- Extend the functional life of slabs and flatwork by 10 to 20 years
Legal note: Documented inspection records are critical. If a surface defect causes injury and you have no inspection history, courts and insurers may treat the absence of records as evidence of negligence. Consistent documentation is your first line of legal defense.
What you need: Tools, checklists, and training for thorough inspections
Now that you know the standards, let’s look at what you’ll need to conduct a professional, thorough concrete inspection.
A proper inspection requires more than a quick walkthrough. You need the right equipment, a standardized checklist, and staff who know what they’re looking for. Skipping any of these three elements is where most property managers lose accuracy.
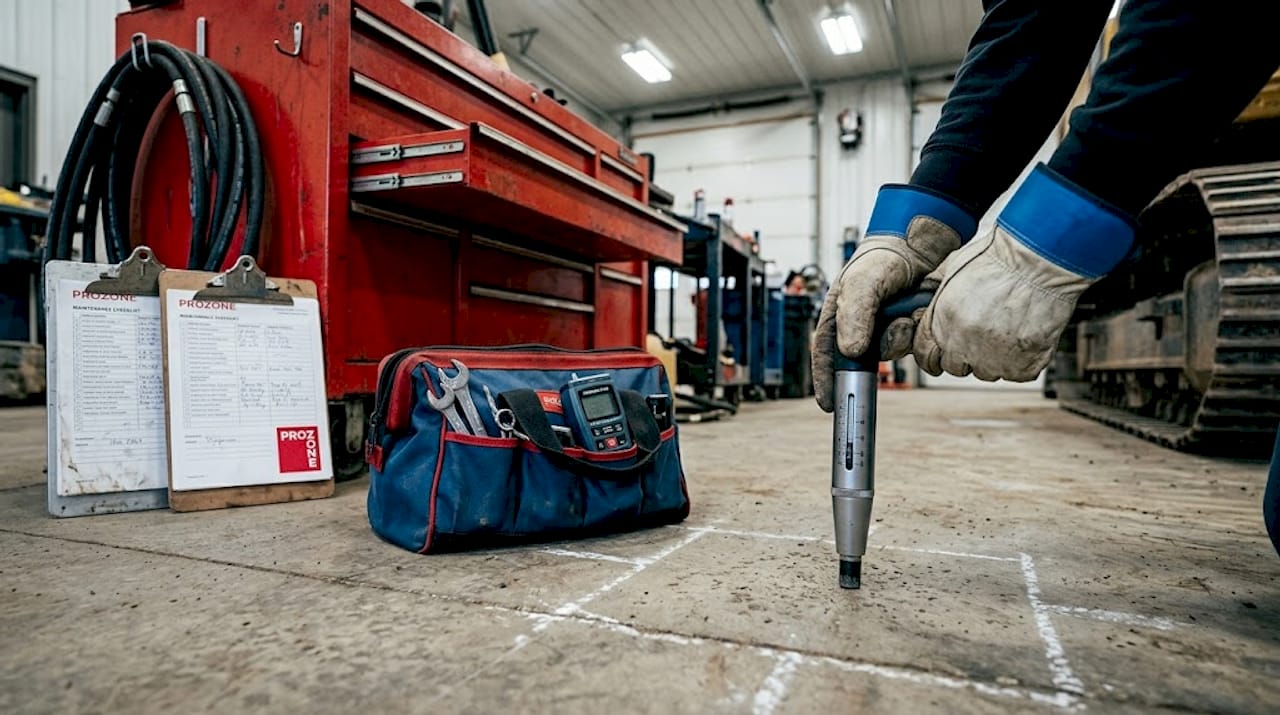
Essential tools for field inspections:
- Bright flashlight or work light for low-angle raking light (reveals surface texture and cracks invisible in flat light)
- Tape measure and crack width comparator card for sizing defects
- High-resolution camera or smartphone with macro mode for documentation
- Screwdriver or probe for testing delamination (a hollow sound means trouble)
- Chalk or marking paint for flagging problem areas in the field
For deeper assessments, non-destructive testing (NDT) methods add precision without cutting into the slab. A rebound hammer measures surface hardness and estimates compressive strength. Ultrasonic pulse velocity equipment detects internal voids or honeycombing. A half-cell potential meter identifies corrosion risk in reinforced slabs before rust staining even appears on the surface.
| Method | What it measures | Best use case |
|---|---|---|
| Visual inspection | Cracks, spalling, staining | Routine checks, all surfaces |
| Rebound hammer | Surface hardness, strength estimate | Suspected weak or damaged zones |
| Ultrasonic pulse velocity | Internal voids, delamination | Thick slabs, structural concerns |
| Half-cell potential | Rebar corrosion probability | Reinforced slabs, parkades |
A standardized concrete maintenance checklist is non-negotiable for consistent results. Checklists remove reliance on memory and individual judgment, which vary widely between staff members and inspection cycles. Each checklist should include surface condition fields, defect location mapping, photographic evidence slots, and a severity rating scale.
Staff training best practices:
- Train inspectors to use raking light technique before relying on NDT equipment
- Run annual refresher sessions that include real defect examples from your own properties
- Pair new staff with experienced inspectors for at least three supervised inspections
- Establish clear severity rating criteria so two inspectors rate the same defect the same way
Pro Tip: Use a cloud-based inspection app to log photos, GPS locations, and defect ratings in real time. Digital records are searchable, shareable with contractors, and far more defensible than handwritten notes. Apps like this also let you track whether defects are growing between inspection cycles.
Pair your field tools with a solid process for maintaining concrete surfaces year-round, not just during formal inspection events.
Step-by-step guide: Inspecting concrete surfaces on your property
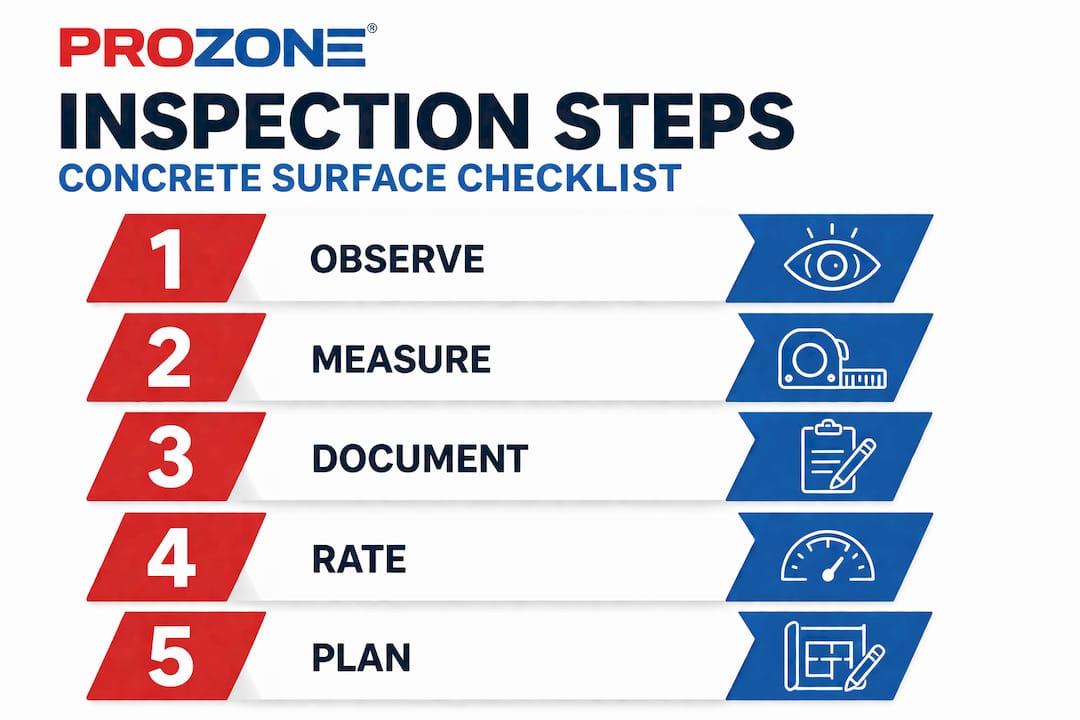
With tools and standards in hand, you’re ready to conduct a thorough inspection. Follow these proven steps for best results.
- Pre-inspection preparation. Review previous inspection reports and repair records for the area. Note any defects that were flagged but not yet repaired, and confirm the original concrete mix design or surface type if records are available. Brief your inspection team on what to prioritize.
- Visual survey from a distance. Walk the perimeter of the surface area first and look for large-scale patterns: settlement, heaving, widespread discoloration, or drainage problems. Patterns visible from 10 to 15 feet often indicate systemic issues rather than isolated damage.
- Close-range visual inspection. Move systematically across the surface in a grid pattern. Use raking light to reveal surface texture changes, hairline cracks, and efflorescence (the white mineral deposits that signal water migration through the slab). Mark every defect with chalk and photograph it before moving on.
- Touch and probe testing. Tap the surface with a screwdriver handle or chain drag across larger areas. A dull, hollow sound indicates delamination or a subsurface void. These areas need priority attention because the surface layer can fail suddenly under load or freeze-thaw pressure.
- Non-destructive testing where warranted. For surfaces showing multiple defects or where structural integrity is uncertain, deploy NDT tools. Run the rebound hammer across suspect zones and compare readings to baseline values. Use half-cell potential testing on any reinforced slab where rust staining or spalling near rebar is visible.
- Document and act on findings. Complete the checklist for every defect: location, size, severity rating, photographic evidence, and recommended action. Step-by-step concrete repair decisions should flow directly from this documentation, not from memory or verbal summaries.
Systematic checklists prevent 85 to 90% of catastrophic surface failures by catching defects at the repairable stage. That’s a compelling number when you consider that a full slab replacement on a commercial property can run tens of thousands of dollars. Understanding structural concrete essentials helps managers prioritize which findings require immediate structural review versus routine maintenance scheduling.
Pro Tip: Photograph every defect with a reference object (a coin, a ruler, or your hand) in the frame. This gives contractors and engineers an immediate sense of scale without needing to revisit the site, and it creates a clear visual baseline for tracking growth over time.
Avoid common mistakes: What property managers in Edmonton overlook
While thorough methods help, managers often overlook key details. Here’s how to avoid the most common and most costly inspection errors.
The most frequently missed warning signs during routine walkthroughs include:
- Hairline cracks under 0.2 mm wide. These look cosmetic but are the entry point for water, chlorides, and freeze-thaw damage.
- Discoloration and staining. Gray or brown patches often signal water infiltration, alkali-silica reaction, or carbonation advancing through the slab.
- Early-stage spalling. Small pop-outs near aggregate particles indicate freeze-thaw damage that will accelerate rapidly without sealing.
- Joint deterioration. Crumbling or missing sealant in expansion joints allows water to undercut the slab edges.
- Pooling water. Standing water after rain signals drainage failure, which accelerates every other defect on this list.
Edmonton’s climate is particularly aggressive on concrete. The city averages over 100 freeze-thaw cycles per year, far more than many other Canadian cities. Each cycle forces water that has entered micro-cracks to expand and contract, widening those cracks incrementally. Over three to five winters, a hairline crack becomes a structural concern. Understanding the causes of concrete cracking specific to Alberta’s climate helps managers recognize which defects are climate-driven and which signal installation or design problems.
ACI 201.1R and CSA A23.1 standards provide the technical baseline, but Edmonton’s freeze-thaw reality means those standards represent a minimum, not a ceiling. Managers who inspect only once a year often miss the critical post-winter window when new damage is fresh and repairs are easiest and cheapest.
Edmonton code compliance reminder: Surface defects that create trip hazards or compromise structural integrity may trigger municipal bylaw requirements for repair timelines. Failing to act on documented defects can expose property owners to fines and increased liability. Document, act, and follow up.
Pro Tip: Schedule two formal inspections per year. The first in late April or early May, after the last freeze-thaw cycles have run their course. The second in late September or early October, before freeze-thaw begins again. This timing lets you repair summer damage before it gets locked under ice and catch winter damage while repair conditions are still favorable. Learn more about managing winter concrete damage before it compounds.
Verifying results: From findings to action plans
After a detailed inspection, translating your findings into timely action is critical for property longevity and occupant safety.
Inspection data is only useful if it drives decisions. A completed checklist sitting in a filing cabinet doesn’t protect anyone. The next step is interpreting what you found and building a prioritized repair plan.
| Defect type | Severity level | Recommended action |
|---|---|---|
| Hairline cracks (under 0.2 mm) | Low | Seal within 30 days, monitor |
| Active cracks (0.2 to 0.5 mm) | Medium | Seal and recheck in 60 days |
| Wide cracks or spalling | High | Repair within 2 weeks |
| Delamination or voids | Critical | Restrict access, repair immediately |
| Rebar corrosion evidence | Critical | Structural engineer review required |
NDT results from the rebound hammer and half-cell potential meter give you quantitative data to back up visual ratings. A rebound hammer reading significantly below baseline in a localized zone confirms weak concrete that needs removal and patching. A half-cell potential reading more negative than minus 350 mV indicates a greater than 90% probability of active corrosion in the rebar, which demands immediate structural attention.
Moving from assessment to repair follows a clear sequence:
- Document all findings with photographs, measurements, and severity ratings before leaving the site.
- Categorize defects by severity (low, medium, high, critical) using the table above as a guide.
- Plan repairs in order of severity, grouping nearby defects where possible to reduce contractor mobilization costs.
- Act on critical and high-severity items within the timeframes above. Do not defer these for budget convenience.
- Review and close out each repair with a post-repair inspection and updated records. Confirm the defect is resolved, not just patched over.
Prioritizing repairs by severity rather than by convenience is a discipline that pays off. Managers who defer high-severity items consistently face compounding costs. A $400 crack repair deferred through one Edmonton winter can easily become a $3,000 slab section replacement by spring. Developing a winter concrete protection strategy alongside your repair plan keeps surfaces in better condition heading into the most damaging season.
The real-world challenge: Why inspections often fall short and what really works in Edmonton
Here’s an uncomfortable truth that most inspection guides won’t tell you: the biggest barrier to effective concrete inspection in Edmonton isn’t lack of technology. It’s culture.
Many property managers rely on “gut feel” walkthroughs rather than standardized checklists. An experienced manager might catch obvious problems, but gut feel misses hairline cracks, subsurface delamination, and early corrosion signals consistently. The data is clear: systematic checklists prevent 85 to 90% of catastrophic failures. Gut feel doesn’t come close to that number.
There’s also a lot of excitement in the industry right now about AI and machine learning inspection tools that claim 99% defect detection accuracy. That sounds impressive. But these systems require controlled lighting, high-resolution imaging rigs, and significant operator training to function reliably. They’re not yet practical for field managers walking a parking lot in Edmonton in October. Investing in an AI inspection platform before your team has mastered a paper checklist is the wrong sequence.
The real lesson: 85 to 90% of failures are preventable with systematic, simple tools. Don’t wait for perfect technology to act. A well-trained inspector with a good checklist and a rebound hammer will outperform an untrained team with expensive software every time.
What actually works in Edmonton is process discipline. Teams that conduct scheduled inspections twice a year, use the same standardized practical maintenance checklist every time, and document findings digitally catch problems early and spend far less on emergency repairs. The investment is in training and consistency, not hardware. That’s a message worth repeating at every facilities team meeting.
Get expert help with your next concrete inspection or repair
Mastering inspection fundamentals puts you ahead of most property managers in Edmonton, but some situations call for professional eyes and specialized equipment. Complex defects, reinforced slab concerns, or surfaces with a history of recurring problems benefit from expert assessment and a structured repair plan.
ProZone Ltd works with commercial, municipal, and private property managers across Edmonton and Alberta, offering concrete maintenance, repair, and surface restoration services backed by real field experience. Whether you need a professional inspection, a detailed repair plan, or ongoing maintenance support, the right starting point is understanding your surfaces fully. Explore the flatwork guide for Alberta managers to sharpen your baseline knowledge, review the surface maintenance guide for year-round strategies, and use the prolong surface life checklist as your starting template. Reach out to ProZone Ltd directly to schedule a consultation or get expert support on your next project.
Frequently asked questions
How often should I inspect concrete surfaces in Edmonton’s climate?
Inspect twice a year: once in spring after freeze-thaw cycles have finished, and once in fall before winter begins. This timing catches the most damage at the most repairable stage.
What are the first signs of major concrete surface problems?
Look for hairline cracks, discoloration, spalling, and pooling water. These visual defects under ACI 201.1R can signal structural risks that require urgent attention.
Which non-destructive tests are best for property managers?
Use a rebound hammer for surface hardness and a half-cell potential meter if you suspect corrosion. Both are straightforward to operate and deliver reliable results without cutting into the slab.
Are there Edmonton-specific regulations for concrete inspections?
Yes. Inspections should align with CSA A23.1 and ACI 201.1R standards for compliance, safety, and legal defensibility on Alberta properties.
What if I find a serious defect but can’t repair it immediately?
Mark and document the area clearly, restrict access if the defect poses a trip or structural hazard, and schedule priority repairs as soon as feasible to prevent further deterioration and limit liability exposure.