
Control joints are planned weak planes in concrete; cut them to at least one quarter of the slab thickness and space them about 24 to 36 times the slab thickness. This forces shrinkage cracks to form along a straight, hidden line rather than an unpredictable path across a visible surface. Sidewalks need tighter spacing, generally 1.2 to 2 metres, because narrower slabs shrink differently than wide floor sections. Joints manage cracking; they do not stop it entirely.
Table of Contents
- What control joints are and why they matter
- When to cut control joints for the best results
- Spacing and depth rules for slabs, sidewalks, and pavements
- Cutting and forming joints: tools and layout technique
- Expansion joints, isolation joints, and when to seal them
- Reducing curling and random cracking through mix and curing
- Fixing cracks, curling, and spalled joint edges
- Cold-climate joint planning from a working crew’s perspective
- Get your control joint layout reviewed before the pour
- Sources
- FAQ
What control joints are and why they matter
Concrete shrinks as it cures and dries, and it expands and contracts with temperature swings. Both movements generate internal tension, and concrete is weak in tension compared to compression. Left alone, that tension finds the path of least resistance and cracks wherever a weak point happens to exist, often in the middle of a visible slab.
A control joint solves this by creating a deliberate weak point. The National Research Council of Canada confirms that joints cut to the correct depth control where shrinkage cracks appear, rather than leaving crack location to chance.
Even well-built slabs develop some cracking over their service life. The goal of jointing is containment, not elimination.
- Drying shrinkage and temperature changes both generate tensile stress in curing concrete.
- A control joint gives that stress a predictable, hidden line to follow.
- Well-jointed slabs still crack occasionally, but the cracks stay straight and unobtrusive.
When to cut control joints for the best results
Timing separates a durable joint from a ragged one. Contractors generally use one of two cutting methods, and each has its own window.
Soft-cut (early-entry) saws can run as soon as the concrete supports foot traffic without marring the surface, often within one to four hours of finishing in warm weather. Conventional wet or dry saw cutting typically follows a later window, commonly six to sixteen hours after placement according to the Cement Association of Canada’s residential flatwork guidance.
- Watch the surface: once bleed water has evaporated and the concrete can bear a person’s weight without deep indentation, it is generally ready for soft-cutting.
- Cut before the concrete’s internal shrinkage stress builds enough to crack on its own, usually within the same working day.
- Adjust timing for temperature: hot, windy days accelerate the window, while cold Edmonton mornings slow curing and push cutting later.
Cutting too early causes raveling, where the saw drags aggregate loose along the joint edge. Cutting too late risks a crack forming before the saw ever reaches the slab, defeating the purpose of the joint entirely.
Pro Tip: Keep a soft-cut saw staged on site during pours in variable spring or fall weather, since temperature swings can shrink the usable cutting window by hours.
Spacing and depth rules for slabs, sidewalks, and pavements
The depth rule is straightforward. A joint must reach at least one quarter of the slab’s thickness, a figure confirmed by both the National Research Council of Canada and ACI Committee 302. For a 100 millimetre slab, that means a minimum cut depth of one quarter of the slab thickness.
Spacing follows the slab thickness as well. Industry guidance recommends 24 to 36 times the slab thickness for floor slabs, which typically works out to about 4 to 5 metres for common residential and commercial thicknesses, as outlined in the Cement Association of Canada’s brochure.
- Standard slabs: depth at one quarter of thickness, spacing at 24 to 36 times thickness (roughly 4 to 5 metres for typical thicknesses).
- Sidewalks: tighter spacing of 1.2 to 2 metres, often matched to the walk’s width.
- Panel shape: keep the length-to-width ratio close to 1:1 or no more than 1.5:1 to avoid uneven stress concentration.
- Treat the upper end of any spacing range as a practical cap, not a target to push past.
Our detailed breakdown of what concrete flatwork involves covers how these thickness and spacing figures interact with load requirements on driveways and parking areas.
Cutting and forming joints: tools and layout technique
Three cutting approaches dominate residential and commercial flatwork: hand tooling a groover into fresh concrete, soft-cutting with an early-entry saw, or conventional saw cutting after initial set. Each has a place depending on schedule and slab size.
- Hand tooling works well on small pours where a finisher can groove joints during the same pass as edging and floating.
- Soft-cutting suits larger commercial pours where crews need to move fast without waiting for full set.
- Conventional saw cutting gives the cleanest, straightest line and is standard on sidewalks, driveways, and parking areas.
Layout matters as much as method. Joints should align under fixed features like columns, drain covers, and slab reentrant corners, and they should run continuous rather than staggered, per ACI’s joint guidance. A blade with the correct diamond specification for the aggregate hardness reduces raveling, and a depth gauge on the saw prevents undercutting the one-quarter minimum.
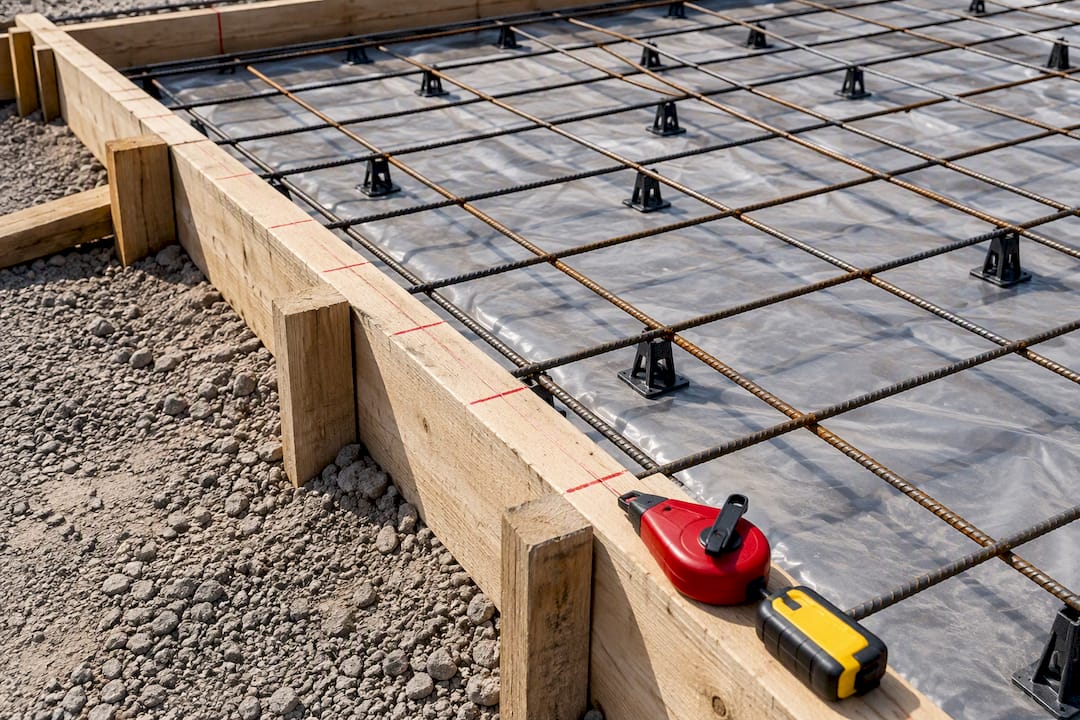
Pro Tip: Mark joint layout on the forms before the pour, not after, so the crew cuts to a plan instead of guessing where the slab will crack.
Expansion joints, isolation joints, and when to seal them
Control joints are not the only joint type on a job site, and mixing them up leads to costly mistakes. Isolation and expansion joints use a compressible filler, typically about 12 millimetres wide, and sit wherever a slab meets a rigid structure such as a building foundation, column, or another slab, as described in NRC’s sidewalk and joint guidance.
- Isolation joints let adjacent elements move independently and prevent one structure from cracking another.
- Dowels transfer load across a joint in heavy traffic areas and reduce edge spalling under repeated wheel loads.
- Control joints are generally left open on interior floors but sealed with a flexible sealant outdoors where freeze-thaw cycling can force water into the cut and widen it over winter.
For a closer look at repair timing on these joints, see our guide to concrete expansion joint repair.
Reducing curling and random cracking through mix and curing
Prevention starts before the saw ever touches the slab. A lower water-to-cement ratio reduces the shrinkage that drives cracking in the first place, and well-graded aggregate limits how much paste is needed to fill voids.
Curing duration and method matter just as much. Moisture gradients between a fast-drying top surface and a damp bottom cause curling, and proper curing narrows that gradient. Our full concrete curing guide walks through schedules suited to variable temperatures.
- Keep the water-to-cement ratio low and aggregate gradation consistent to limit shrinkage volume.
- Cure long enough to even out moisture loss between the top and bottom of the slab.
- Sequence pours around weather: cold snaps slow curing and demand cover or blankets to protect fresh concrete.
Pro Tip: Schedule outdoor pours to avoid rapid overnight temperature drops common in shoulder-season Edmonton weather, since a fast freeze on uncured concrete can undo weeks of proper mix design.
Fixing cracks, curling, and spalled joint edges
Not every crack needs immediate repair. Hairline cracks along a properly placed control joint are the system working as intended, and monitoring over one or two seasons often shows no further movement.
- If a crack appears outside a joint line, cutting a new relief joint nearby can redirect future movement without full replacement.
- Curled slab edges can often be ground level rather than replaced, and voids underneath can be filled by grouting to restore support.
- Spalled or raveled joint edges on industrial floors need prompt attention, since forklift traffic concentrates load right at the joint edge and accelerates damage.
Our step-by-step concrete repair guide covers when a partial-depth patch is enough and when a full-depth replacement is the safer call. For background on what drives cracking in the first place, see what causes concrete to crack.
Cold-climate joint planning from a working crew’s perspective
Freeze-thaw cycling is the toughest test a joint ever faces. Water that enters an unsealed control joint and freezes can widen the cut season over season, so we plan sealant application and joint layout before the first pour, not after the first winter.
Preconstruction review of joint spacing against slab geometry catches problems that are cheap to fix on paper and expensive to fix in concrete. Property managers planning a large slab or high-traffic pad can request an on-site layout review before work begins.
— ProZone
Get your control joint layout reviewed before the pour
A joint layout that ignores Alberta’s freeze-thaw cycle costs more in repairs than it ever saves in shortcuts. The application of Alberta Safety Codes and ACI-based joint spacing is standard practice for concrete projects, with attention to saw-cut timing and depth control that many generic contractors may overlook.
Whether the project is a residential driveway, a commercial parking lot, or a municipal sidewalk network, our crews handle layout, saw cutting, sealing, and remedial joint repair as part of our concrete services. Free on-site consultations are offered within an approximate 100 kilometre radius, along with flexible after-hours scheduling for projects requiring it.
Contact ProZone through our contact page or call directly to book a free estimate for your next concrete project.
Sources
- National Research Council of Canada publication
- ACI 302.1R-15: Guide to concrete floor and slab construction (preview)
- Cement Association of Canada residential flatwork brochure (July 2025)
- NRC guidance on sidewalks and joints
FAQ
How often are control joints needed in concrete?
Control joints are needed on nearly every concrete slab, spaced at roughly 24 to 36 times the slab thickness for floors and driveways. Sidewalks need tighter spacing of 1.2 to 2 metres because of their narrower width.
Should you fill control joints in concrete?
Outdoor control joints in freeze-thaw climates generally benefit from a flexible sealant to keep water and debris out of the cut. Indoor floors are often left unsealed unless they carry hard-wheeled traffic, where a semirigid filler helps preserve the joint edge.
Does a 10×10 concrete slab need control joints?
Yes, a slab that size typically needs at least one control joint, and often more, depending on thickness. A 100 millimetre thick slab calls for spacing near the 24 to 36 times thickness rule, which usually places a joint about 4 to 5 metres apart for typical thicknesses.
How far apart should control joints be placed in concrete?
Standard floor slabs use spacing of 24 to 36 times the slab thickness, commonly working out to about 4 to 5 metres for typical thicknesses. Sidewalks require closer spacing of 1.2 to 2 metres due to their narrower profile.